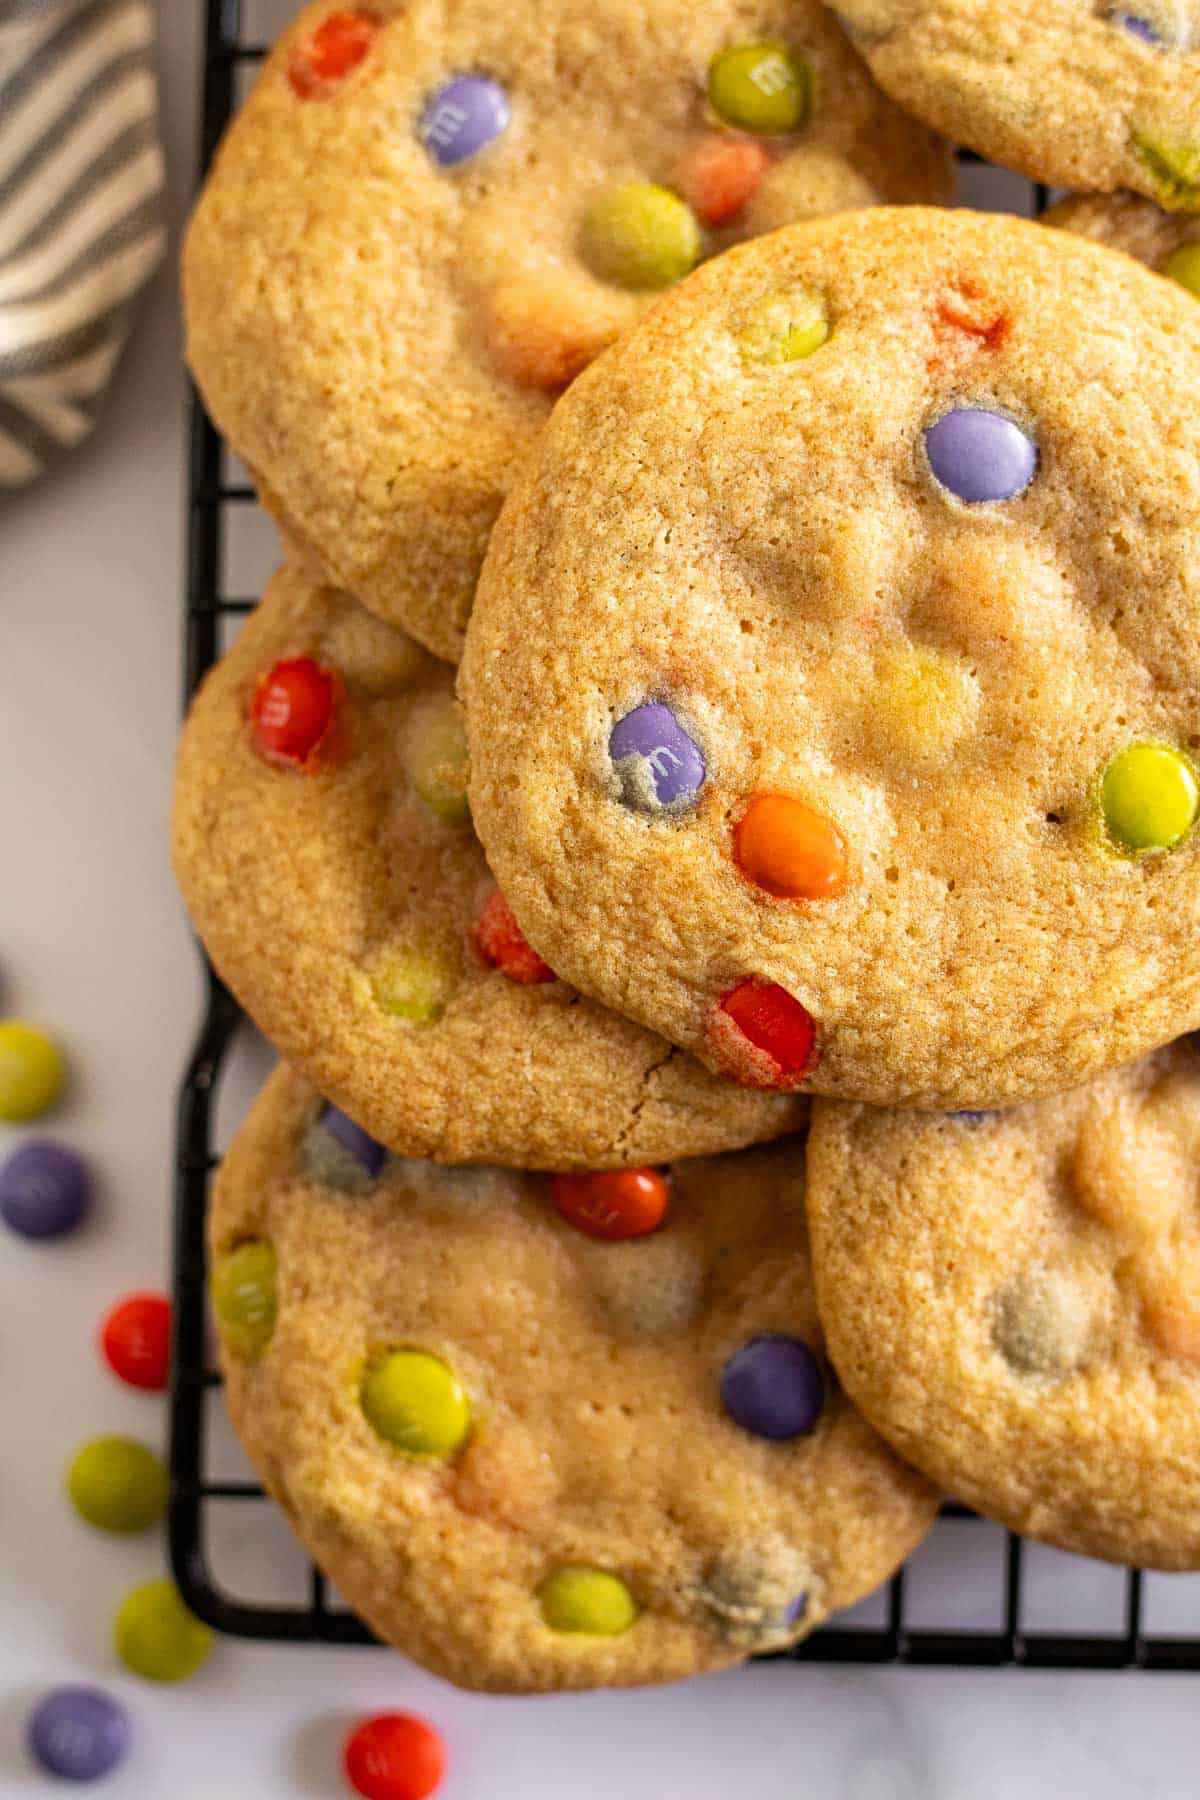
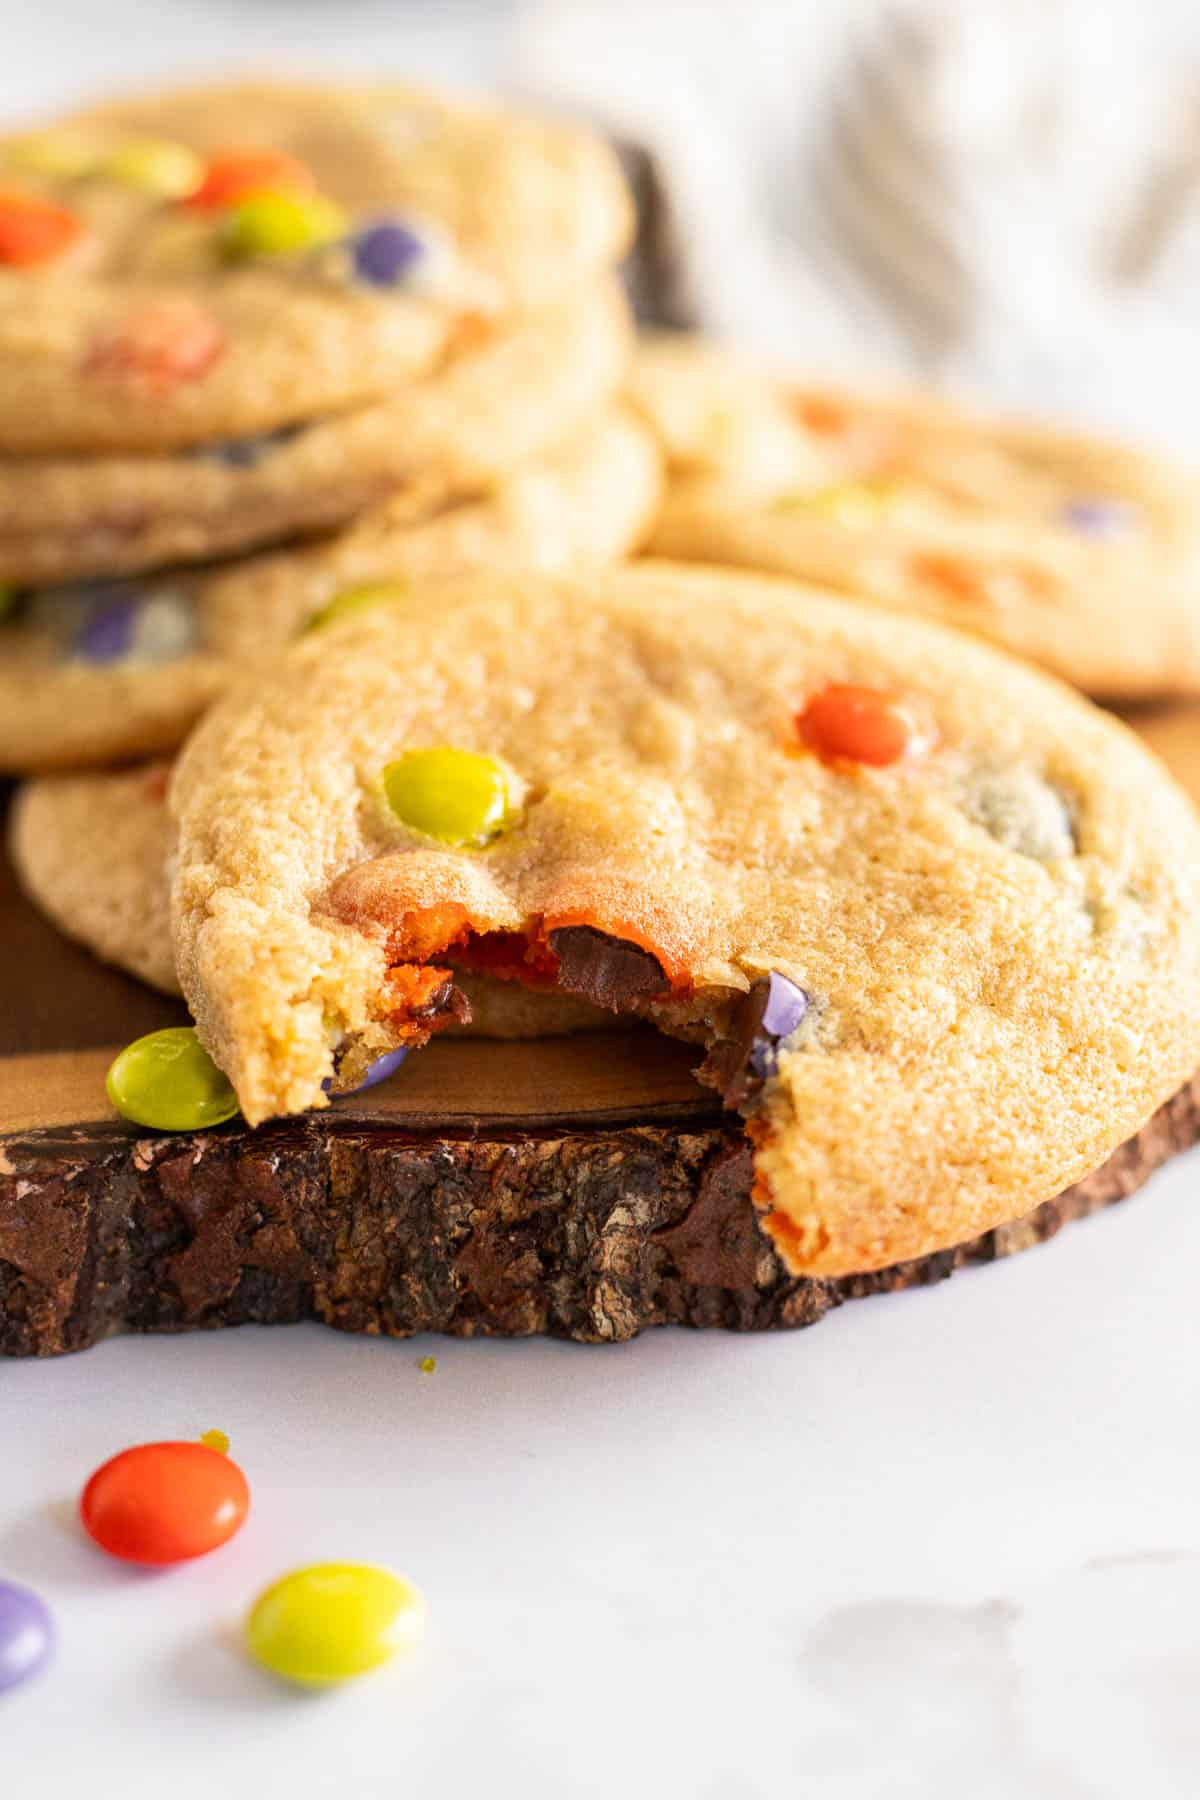
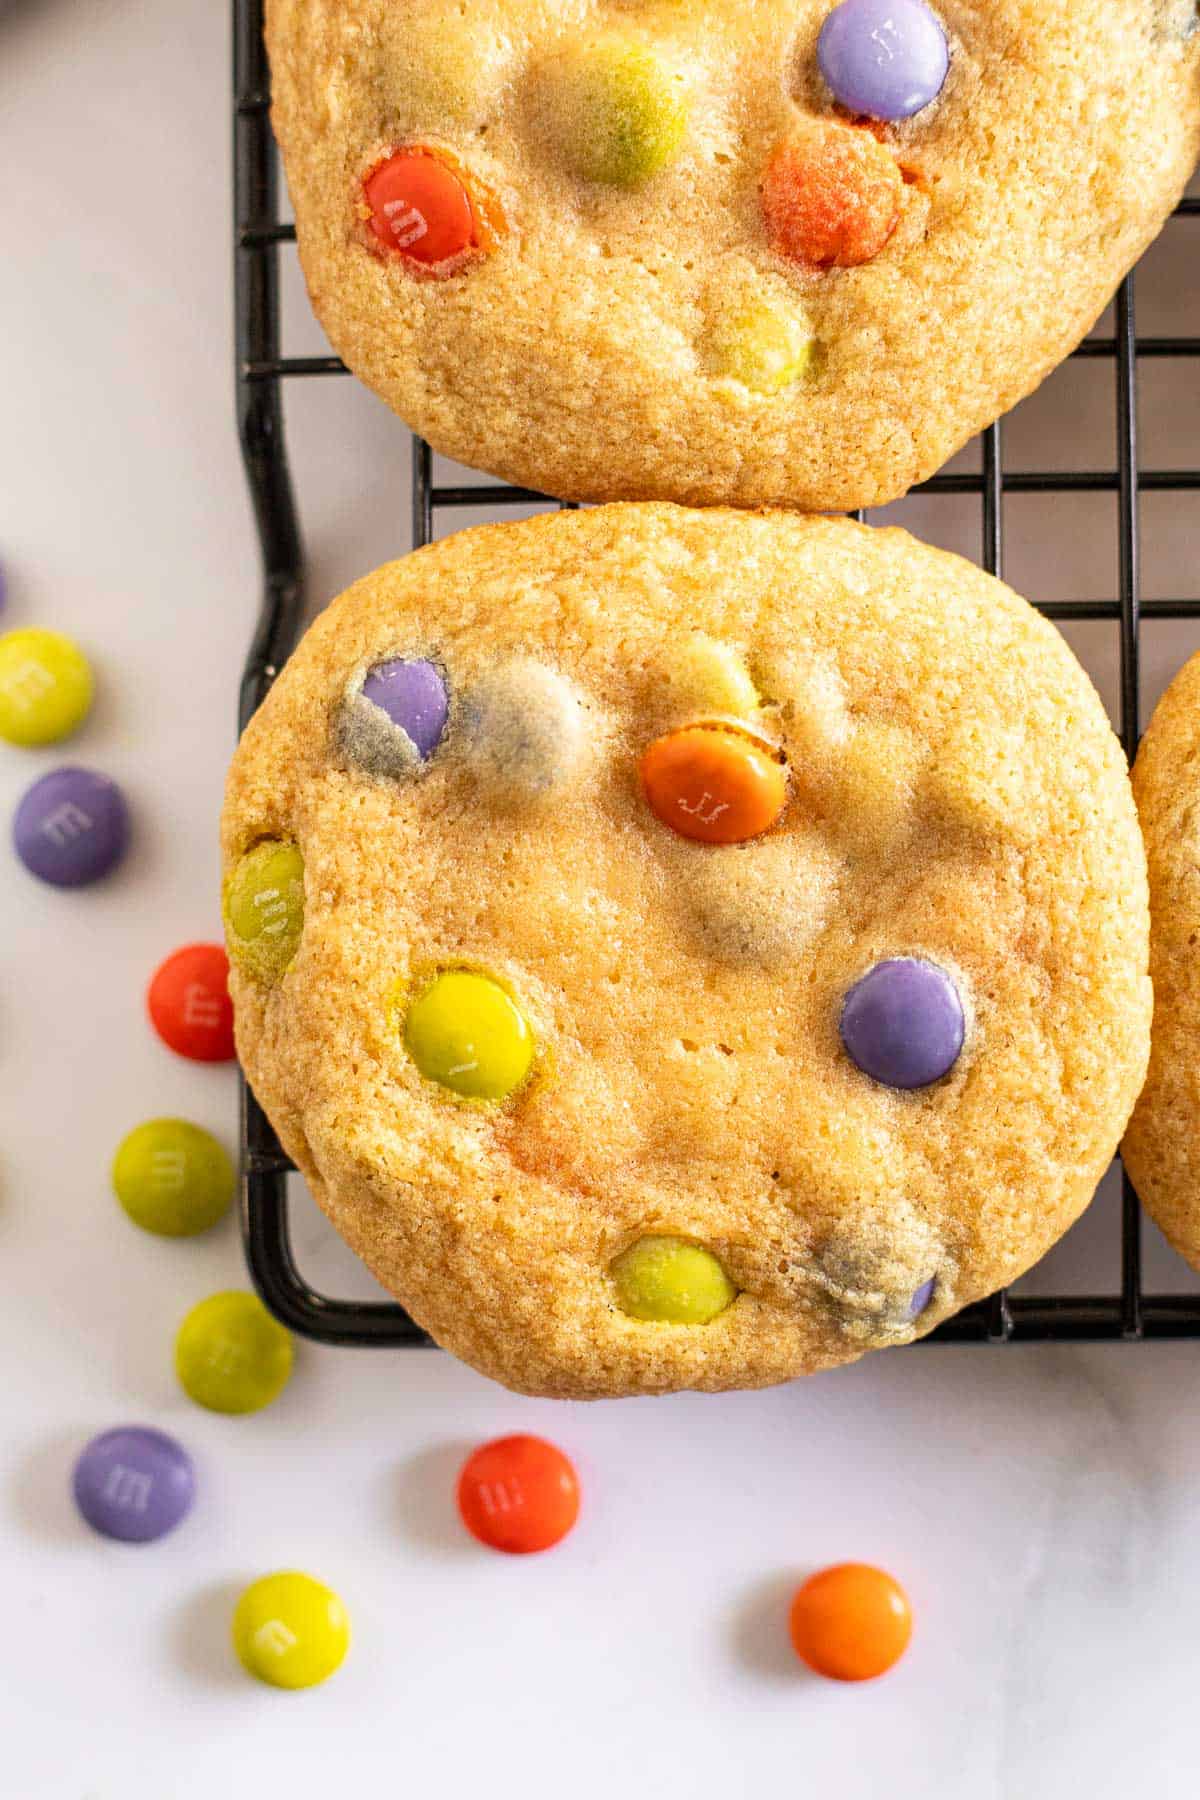
These Halloween M&M Cookies are a fun, spooky twist on my small batch M&M cookies. They're soft, chewy, and loaded with Halloween M&Ms. This one bowl, no-chill cookie recipe takes 30 minutes and is great to bake for a last minute treat!
Jump to:
You'll LOVE these frightfully delicious Halloween M&M Cookies! They're simple, sweet, and have the perfect amount of chocolate in every bite.
Best of all, they take 30 minutes from start to finish and are great for serving at your next Halloween party alongside these Black Velvet Cupcakes!
Why You'll Love This Recipe
- Soft, chewy cookies: These M&M cookies are soft, chewy, and have just the right amount of sweetness.
- Minimal dishes: Yes, you read that right! All you need is two bowls and a wooden spoon to mix these up.
- No chill time needed: There's no need to chill the cookie dough, just mix, scoop, and bake.
- Chocked full of Halloween M&Ms: The Ghoul's Mix M&Ms are the perfect Halloween colors!
- Great for a Halloween party for kids OR adults: Both kids and adults love these chewy Halloween cookies, so make a batch (or two!) for your next party.
Key Ingredients Needed
*for the full list of ingredients and measurements, see recipe card below*
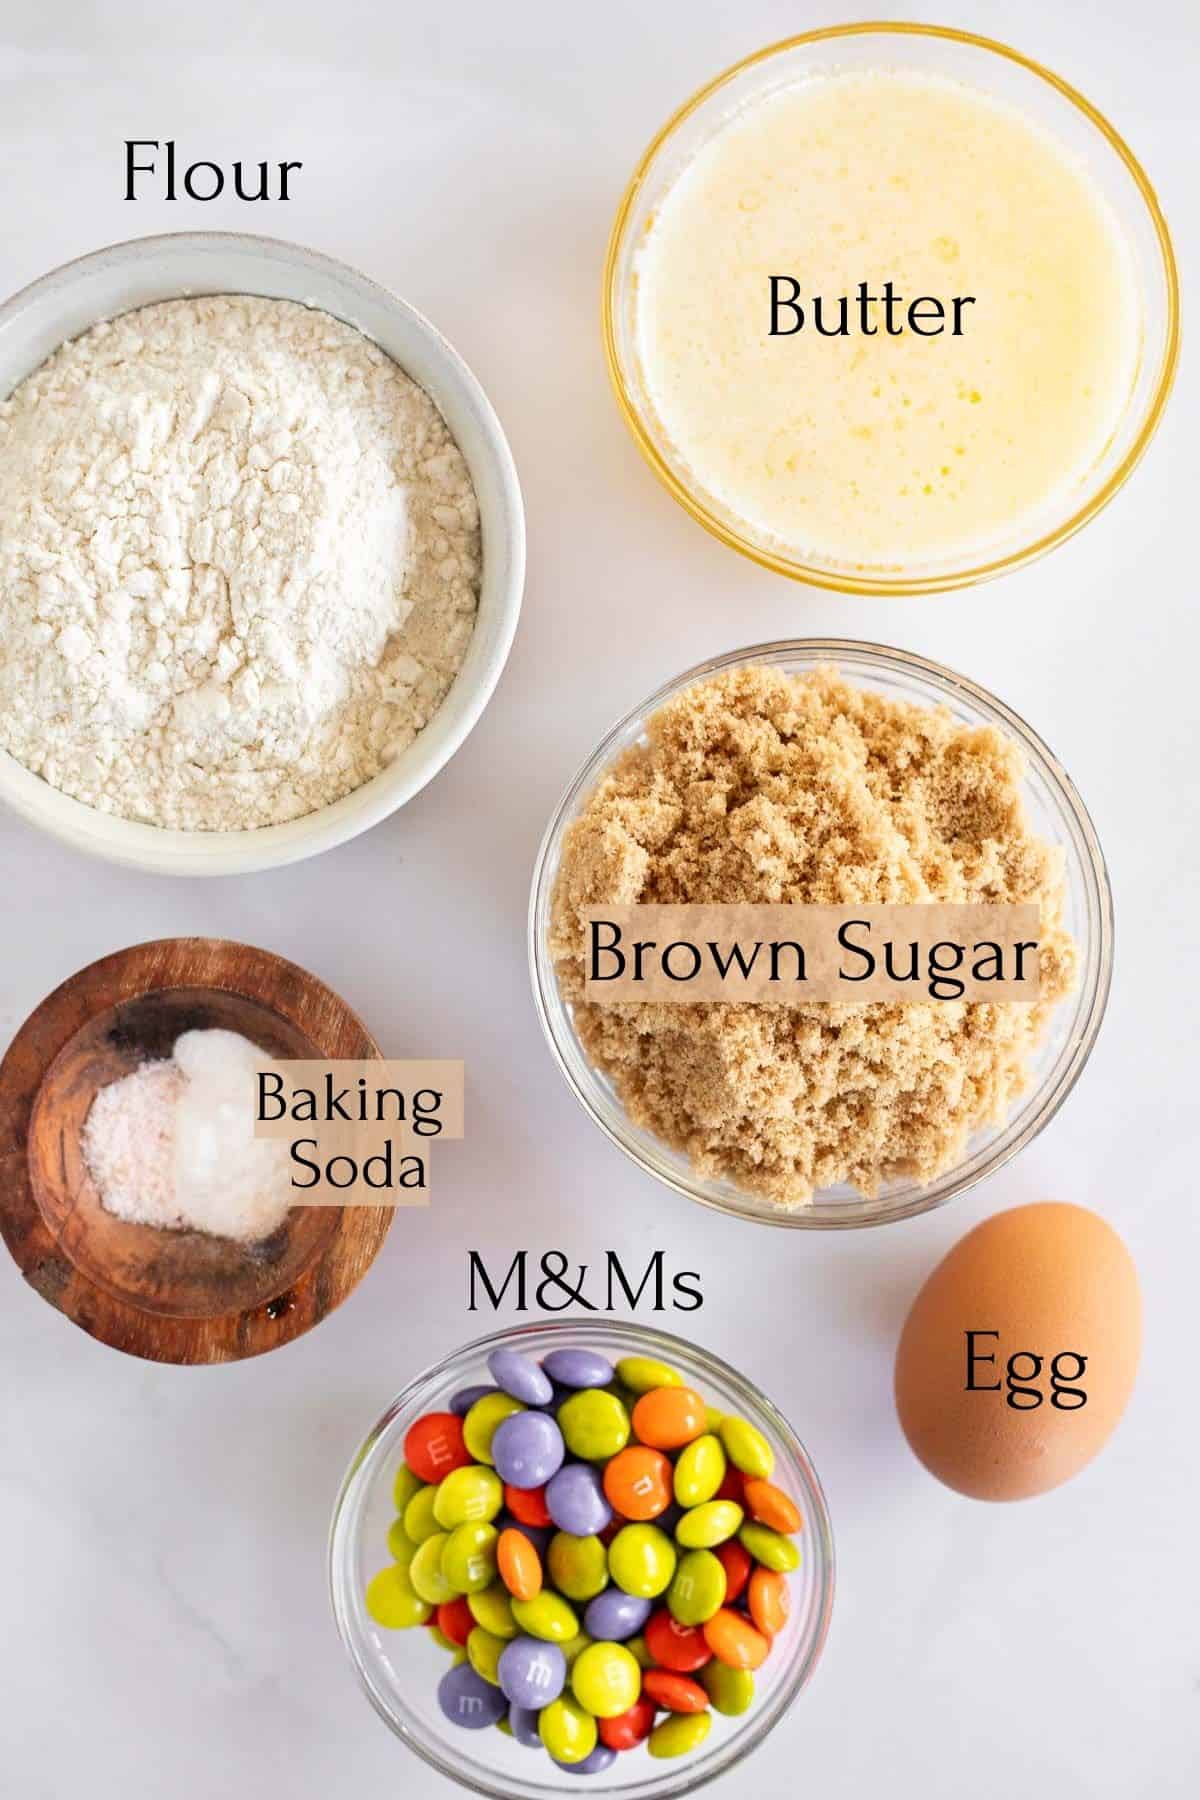
- Butter: When I bake I typically use salted butter to keep the flavors balanced. However, use whatever you have on hand, salted or unsalted work the same.
- Brown sugar: I used light brown sugar for this recipe, but you could also use dark brown sugar. They both work, the only variation will be in the color.
- Egg: You'll need one large egg, and it's best if it's at room temperature so the dough mixes together easier.
- Vanilla: A splash of vanilla extract adds a sweet hint of floral flavor!
- Flour: I tested this recipe with a high quality all purpose flour like King Arthur, and it works well every time.
- Baking soda: Baking soda is needed to spread the cookies so they're soft and chewy instead of thick and cakey.
- M&Ms: You need the Halloween 'Ghoul's Mix' for these cookies! I found them at Target, but you could also try online or your local party store.
How To Make Halloween M&M Cookies
STEP ONE: In a microwave safe bowl, melt the butter. Let it cool for 5 minutes while you preheat the oven to 350°F and line a baking sheet with parchment paper.
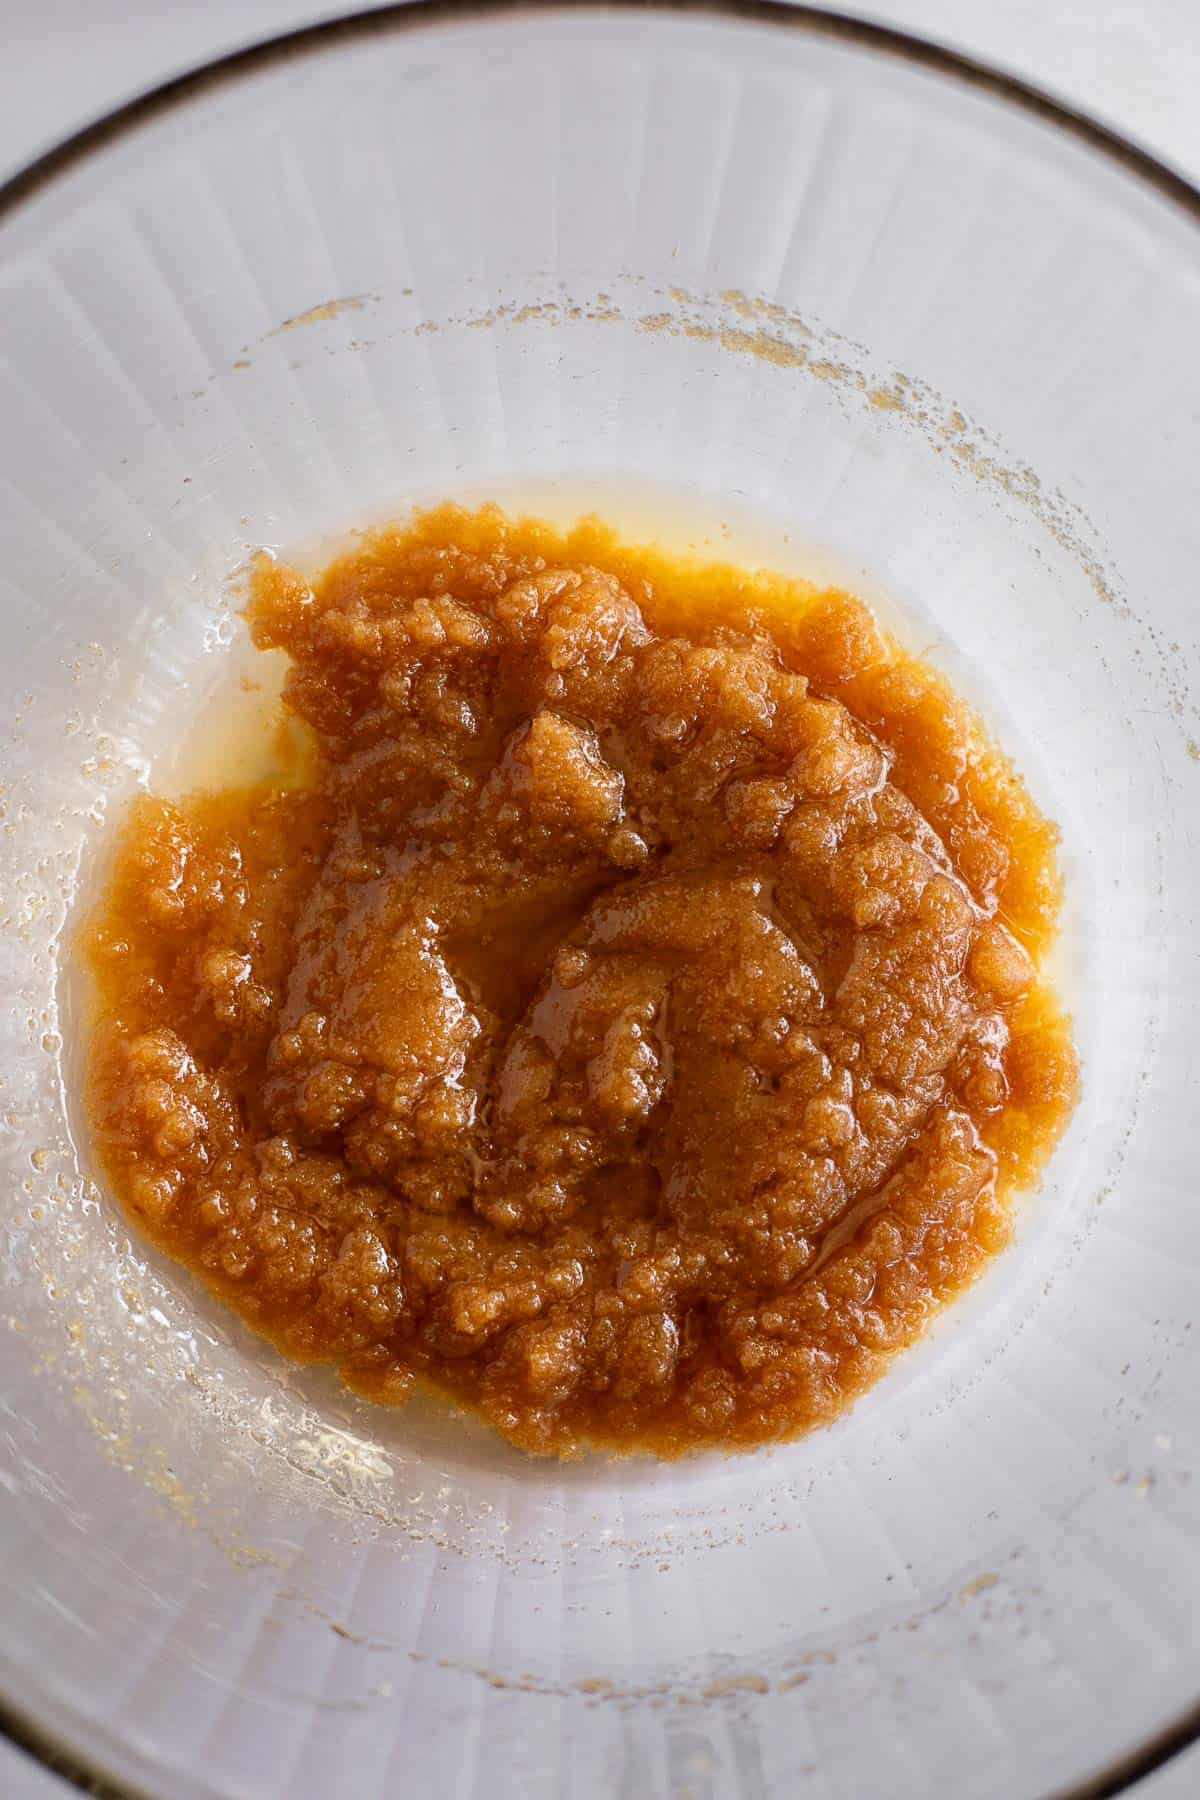
STEP TWO: In a large mixing bowl, add the cooled butter and brown sugar. Mix until well combined.
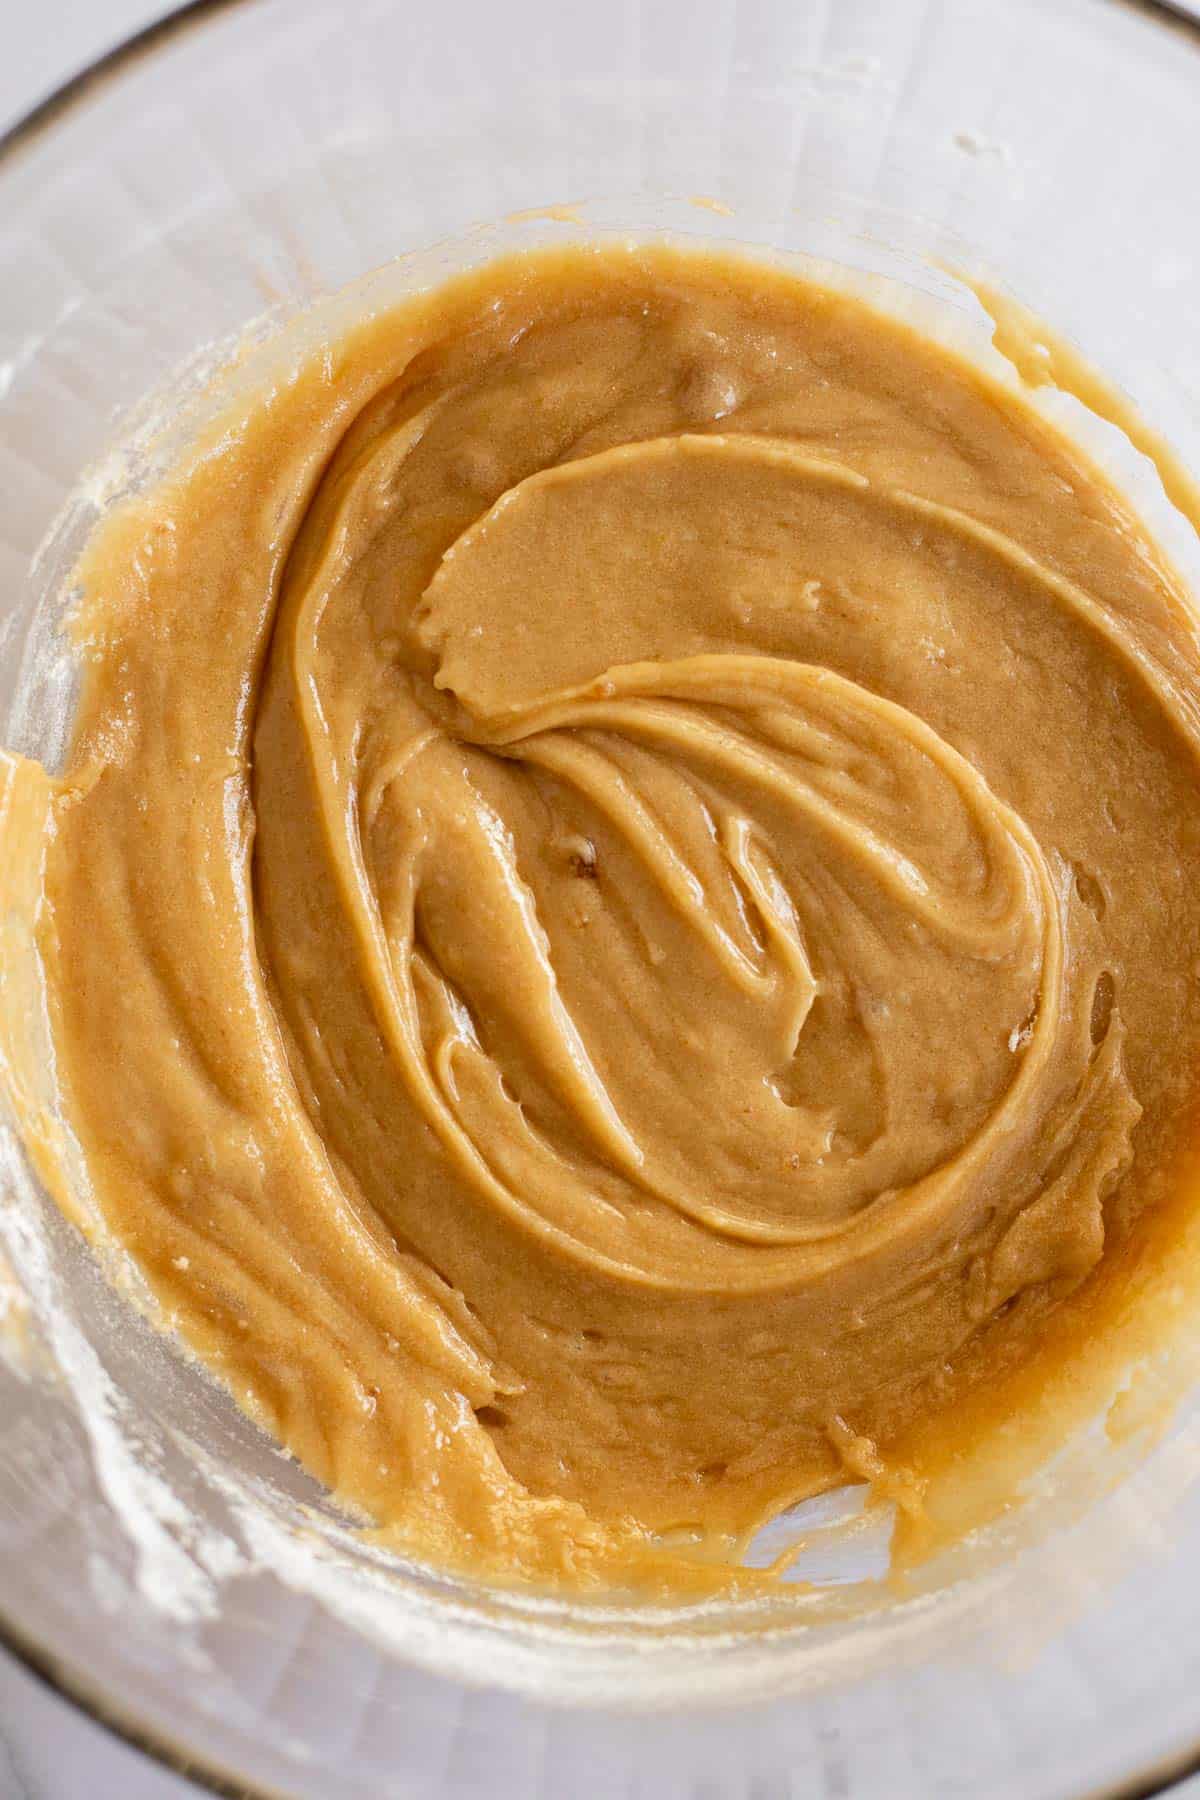
STEP THREE: Add the egg and the vanilla extract to the butter/sugar mixture and again, mix well.

STEP FOUR: Add the dry ingredients into the wet ingredients and gently mix until just combined.
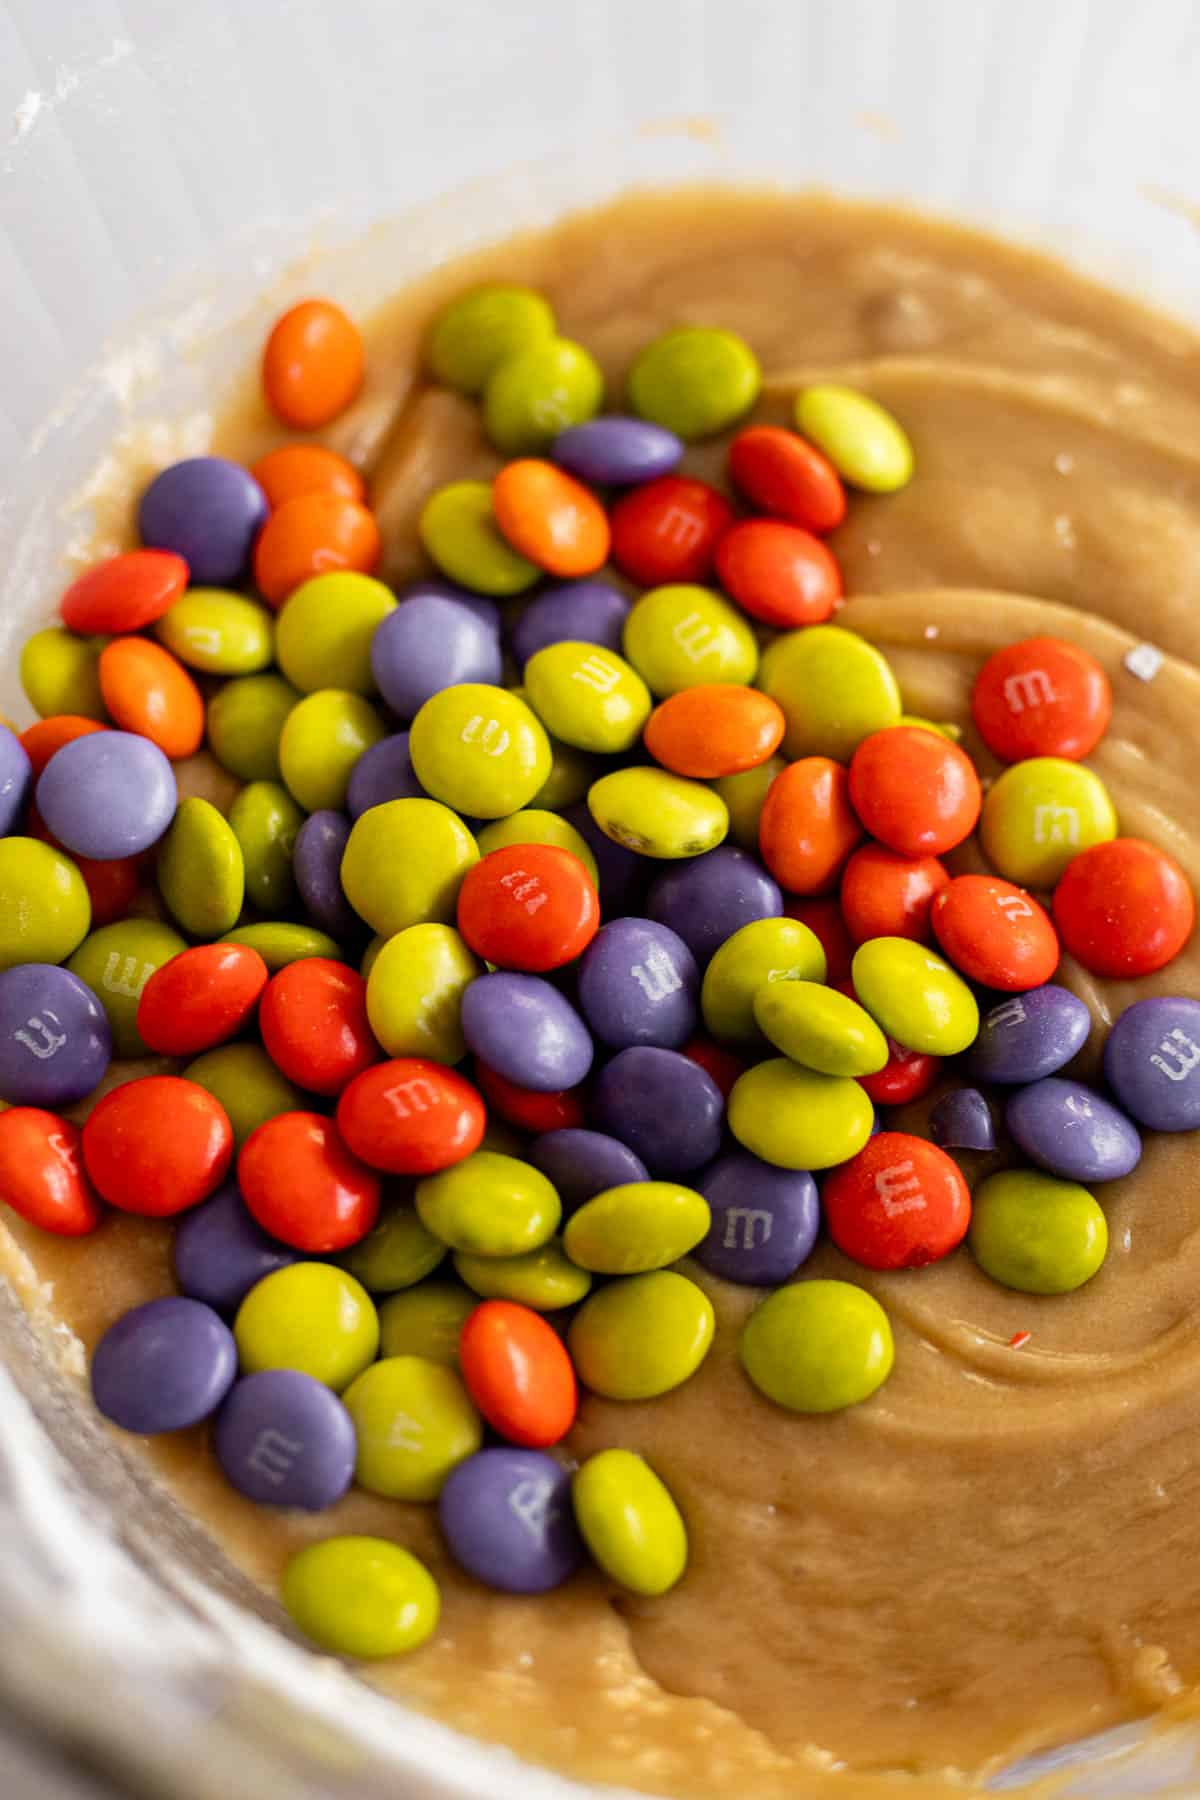
STEP FIVE: Pour the Halloween M&Ms into the cookie dough and fold them in.
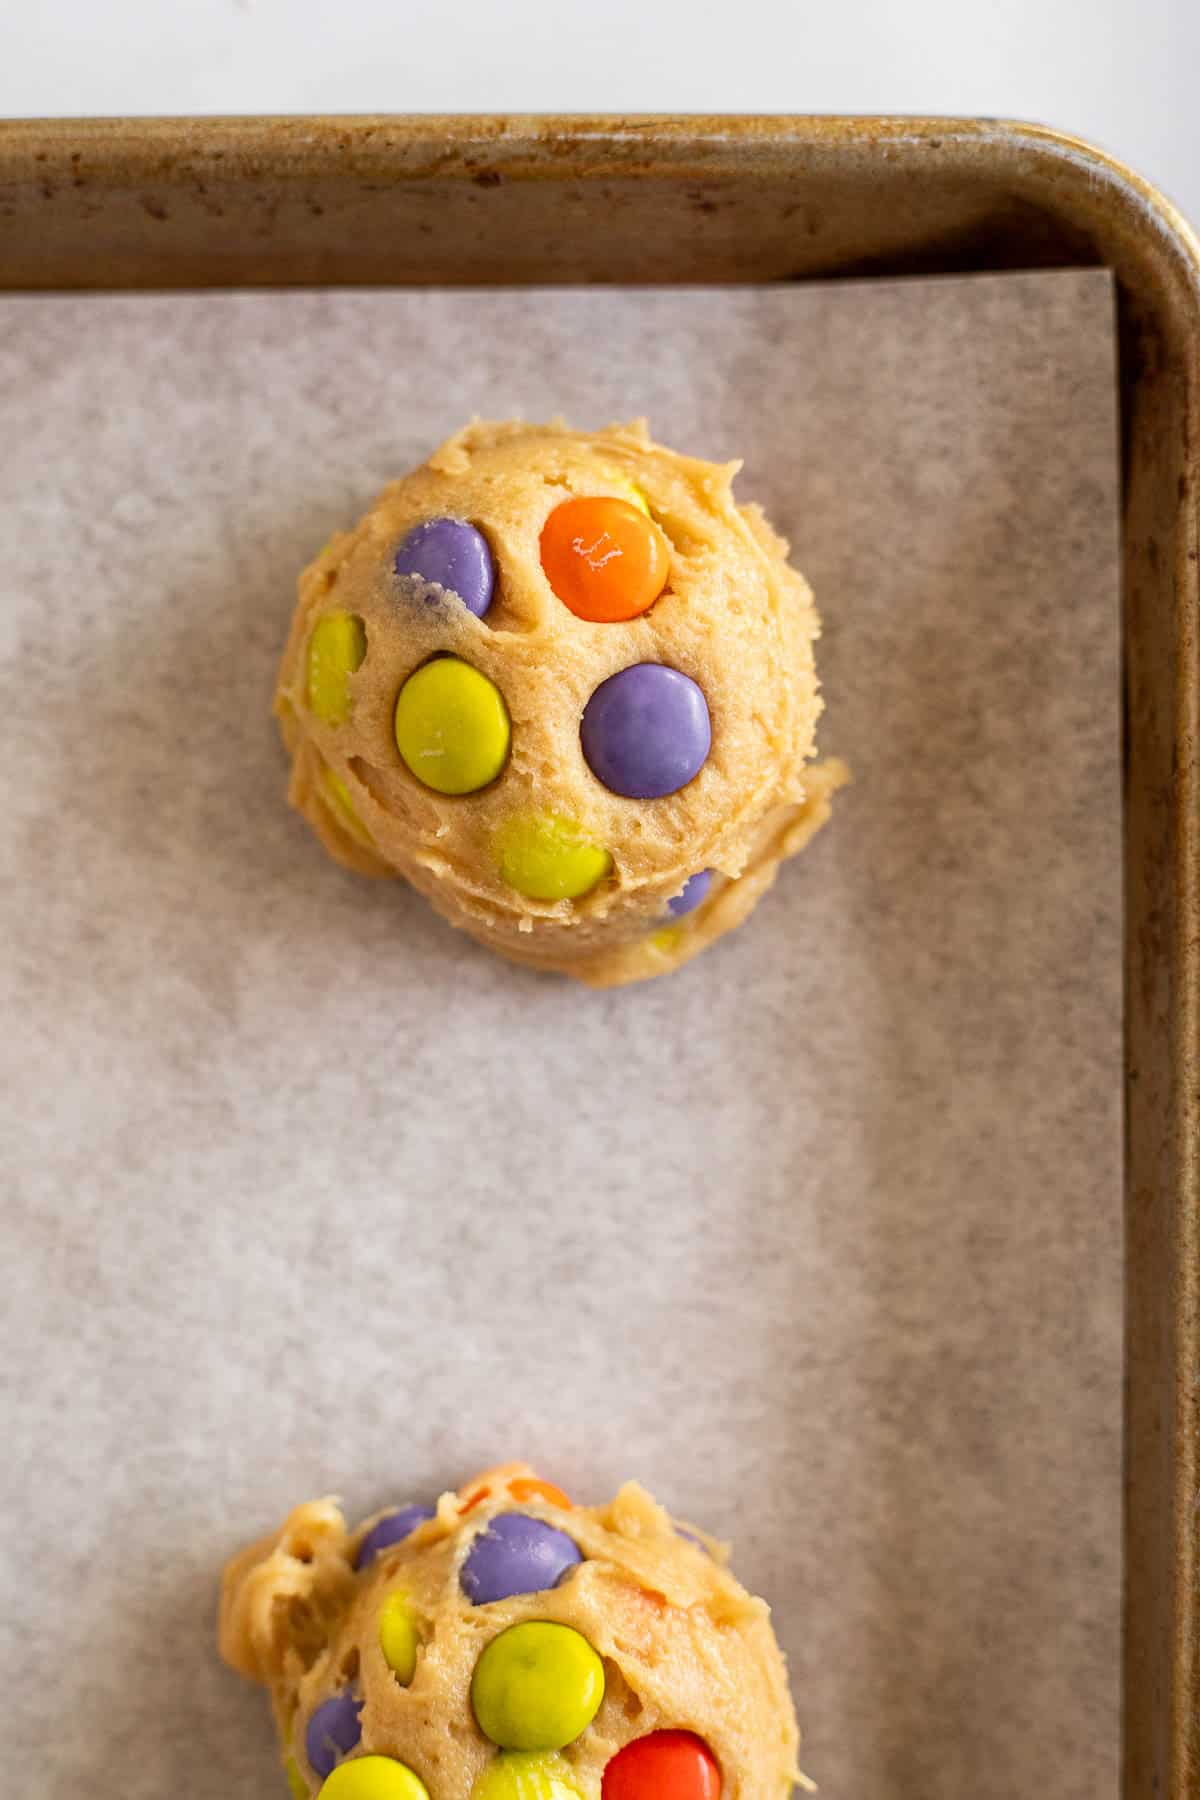
STEP SIX: Use a large cookie scoop to scoop the M&M cookie dough out onto the parchment lined baking sheet, keeping 2 inches between each scoop.
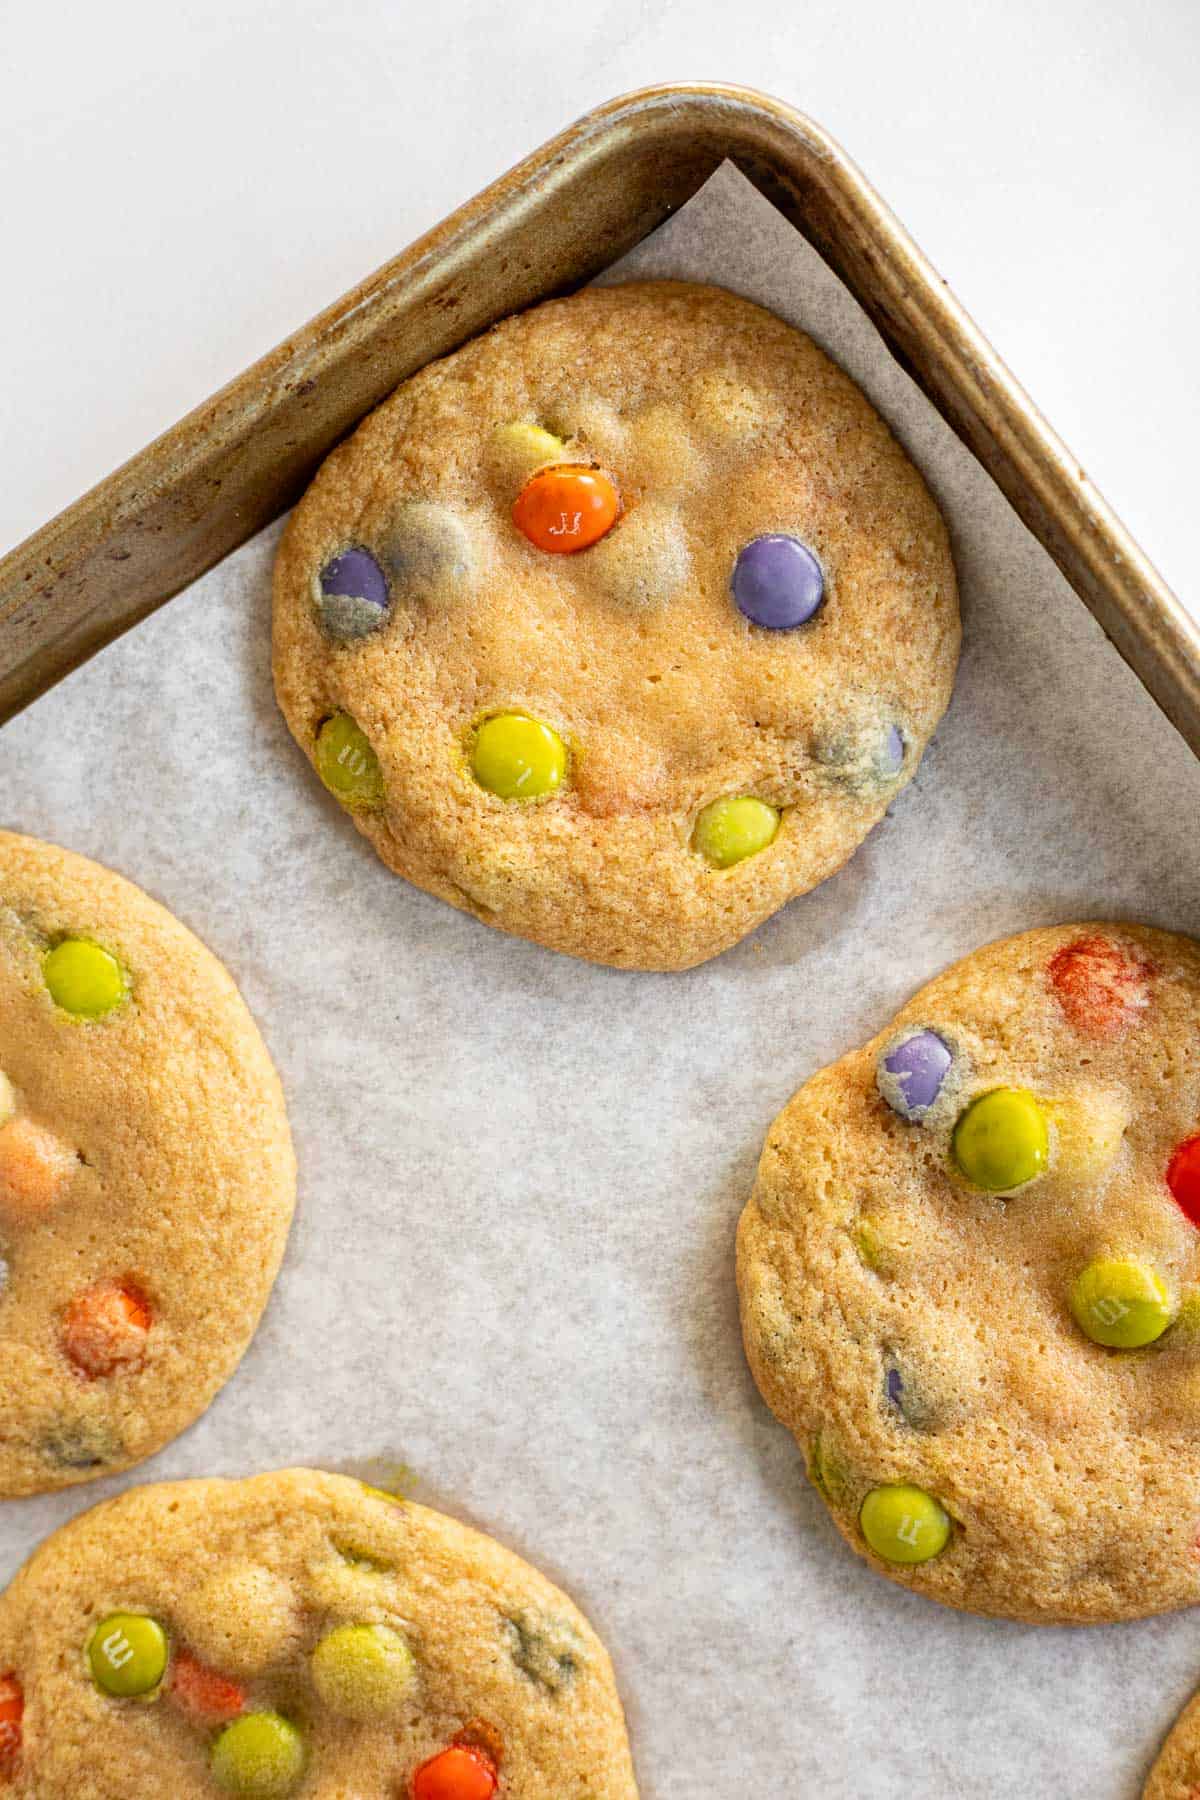
STEP SEVEN: Bake for 9-11 minutes, or until the edges of the cookies start to look slightly golden brown. Carefully take the tray out of the oven and allow the cookies to cool for 5 minutes on the tray before transferring them to a wire rack.
Expert Tips
- Use room temperature ingredients: This is key if you want a smooth dough that mixes together easily!
- Measure properly: I've listed the ingredients in grams so that you can accurately measure. Volume measurements can vary greatly, so weight is the best way to go.
- Don't over mix: You only need to mix until the dry ingredients are fully combined. If you over mix the dough, the cookies will turn out tough and dense instead of chewy.
- Bake on parchment paper: To prevent the cookies from sticking to the sheet tray, I like to bake on parchment paper.
- Use an oven thermometer: The temperatures in ovens can vary SO much. It's best if you use an oven thermometer so you can get an accurate baking time every time you bake.
- Add extra M&Ms on top: For a real bakery quality look, add a few M&Ms on top of the dough balls before you bake them.
Recipe Variations
Dairy free: Substitute the butter with a dairy free butter stick and use a vegan alternative to M&Ms.
Gluten free: Substitute the all purpose flour with a gluten free all purpose flour blend that contains xanthan gum.
Additions: If you wanted to, you could add some mini M&Ms (pick out the orange and brown ones!), some mini chocolate chips, or toasted peanuts for some texture.
Frequently Asked Questions
This recipe has not been tested, but it should work if you substitute the all purpose flour with a gluten free all purpose flour that contains xanthan gum.
I was able to find them at Target. If you can't find them there check your local grocery store, or party stores tend to carry M&Ms sorted by color so you can pick what you want.
No, this is a no-chill cookie dough recipe! Just mix everything together, bake, and enjoy.
Storing and Freezing Instructions
STORING- Keep leftover cookies in an airtight container at room temperature for up to 4 days.
FREEZING- If you'd like to enjoy Halloween cookies at any time, you can freeze them once baked! Wrap individually in plastic wrap then again in aluminum foil. Freeze for up to three months, then thaw to room temp and enjoy.
More Halloween Recipes You'll Love!
Did you make these spooky Halloween M&M cookies? If so, I would appreciate you leaving a comment and star rating down below.
Additionally, follow me on Instagram (@coleinthekitchen), Pinterest, or Facebook. Or sign up for my email list so you never miss a new recipe!
PrintHalloween M&M Cookies

These Halloween M&M Cookies are a fun, spooky twist on my small batch M&M cookies. They're soft, chewy, and loaded with Halloween M&Ms. This one bowl, no-chill cookie recipe takes 30 minutes and is great to bake for a last minute treat!
- Prep Time: 15 minutes
- Cook Time: 10 Minutes
- Total Time: 25 minutes
- Yield: 10 Cookies 1x
- Category: Cookies
- Method: Baking
- Cuisine: American
Ingredients
- 113g butter- melted (1 stick)
- 145g light brown sugar (about ¾ cup)
- 1 large egg- room temperature
- 1 teaspoon vanilla extract
- 170g all purpose flour (about 1 ⅓ cups)
- ¾ teaspoon baking soda
- ¼ teaspoon salt
- 150g Halloween M&Ms (¾ cup)
Instructions
- In a microwave safe bowl, melt the butter. Let it cool for 5 minutes
- While the butter is cooling, preheat the oven to 350°F and line a baking sheet with parchment paper.
- In a large mixing bowl, combine cooled butter and brown sugar and mix until well combined.
- Next, add the egg and vanilla extract to the butter/sugar mixture and again, mix well.
- Add the flour, baking soda, and salt to the wet ingredients and gently mix until just combined and no traces of flour remain.
- Pour the Halloween M&Ms on top of the cookie dough and use a rubber spatula to fold them in until evenly distributed.
- Use a large cookie scoop (about 2 tablespoons) to scoop your cookie dough out onto parchment lined baking sheet, leaving 2 inches between each cookie
- Place a few extra M&Ms on top of each ball of dough, then bake for 8-10 minutes, or until the edges are slightly golden brown.
- Carefully take the baking sheet out of the oven and allow the Halloween cookies to cool on it for 5 minutes before transferring to a wire rack to finish cooling completely.
Notes
- Use room temperature ingredients: This is key if you want a smooth dough that mixes together easily!
- Measure properly: I've listed the ingredients in grams so that you can accurately measure. Volume measurements can vary greatly, so weight is the best way to go.
- Don't over mix: You only need to mix until the dry ingredients are fully combined. If you over mix the dough, the cookies will turn out tough and dense instead of chewy.
- Bake on parchment paper: To prevent the cookies from sticking to the sheet tray, I like to bake on parchment paper.
- Use an oven thermometer: The temperatures in ovens can vary SO much. It's best if you use an oven thermometer so you can get an accurate baking time every time you bake.
- Add extra M&Ms on top: For a real bakery quality look, add a few M&Ms on top of the dough balls before you bake them.
- Storing: Keep leftover cookies in an airtight container at room temperature for up to 4 days.


Leave a Reply