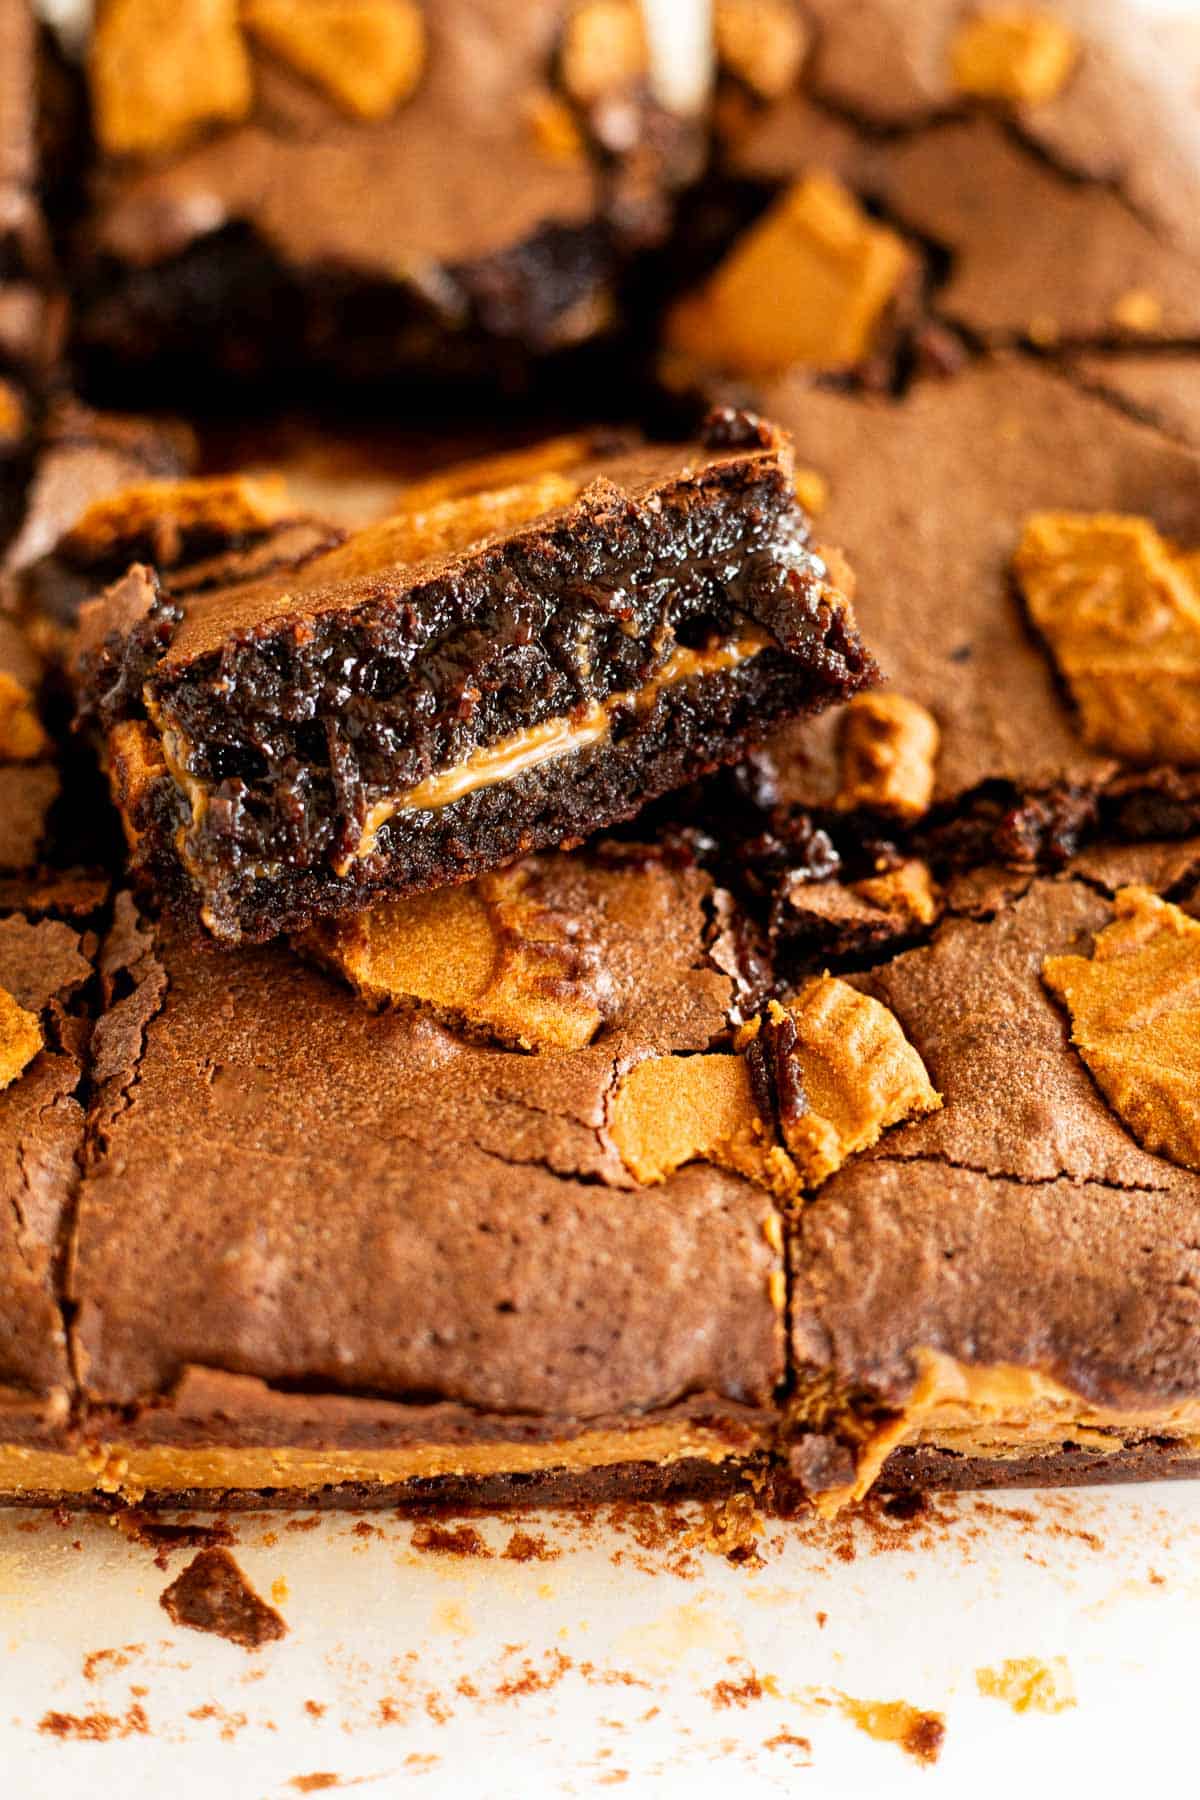
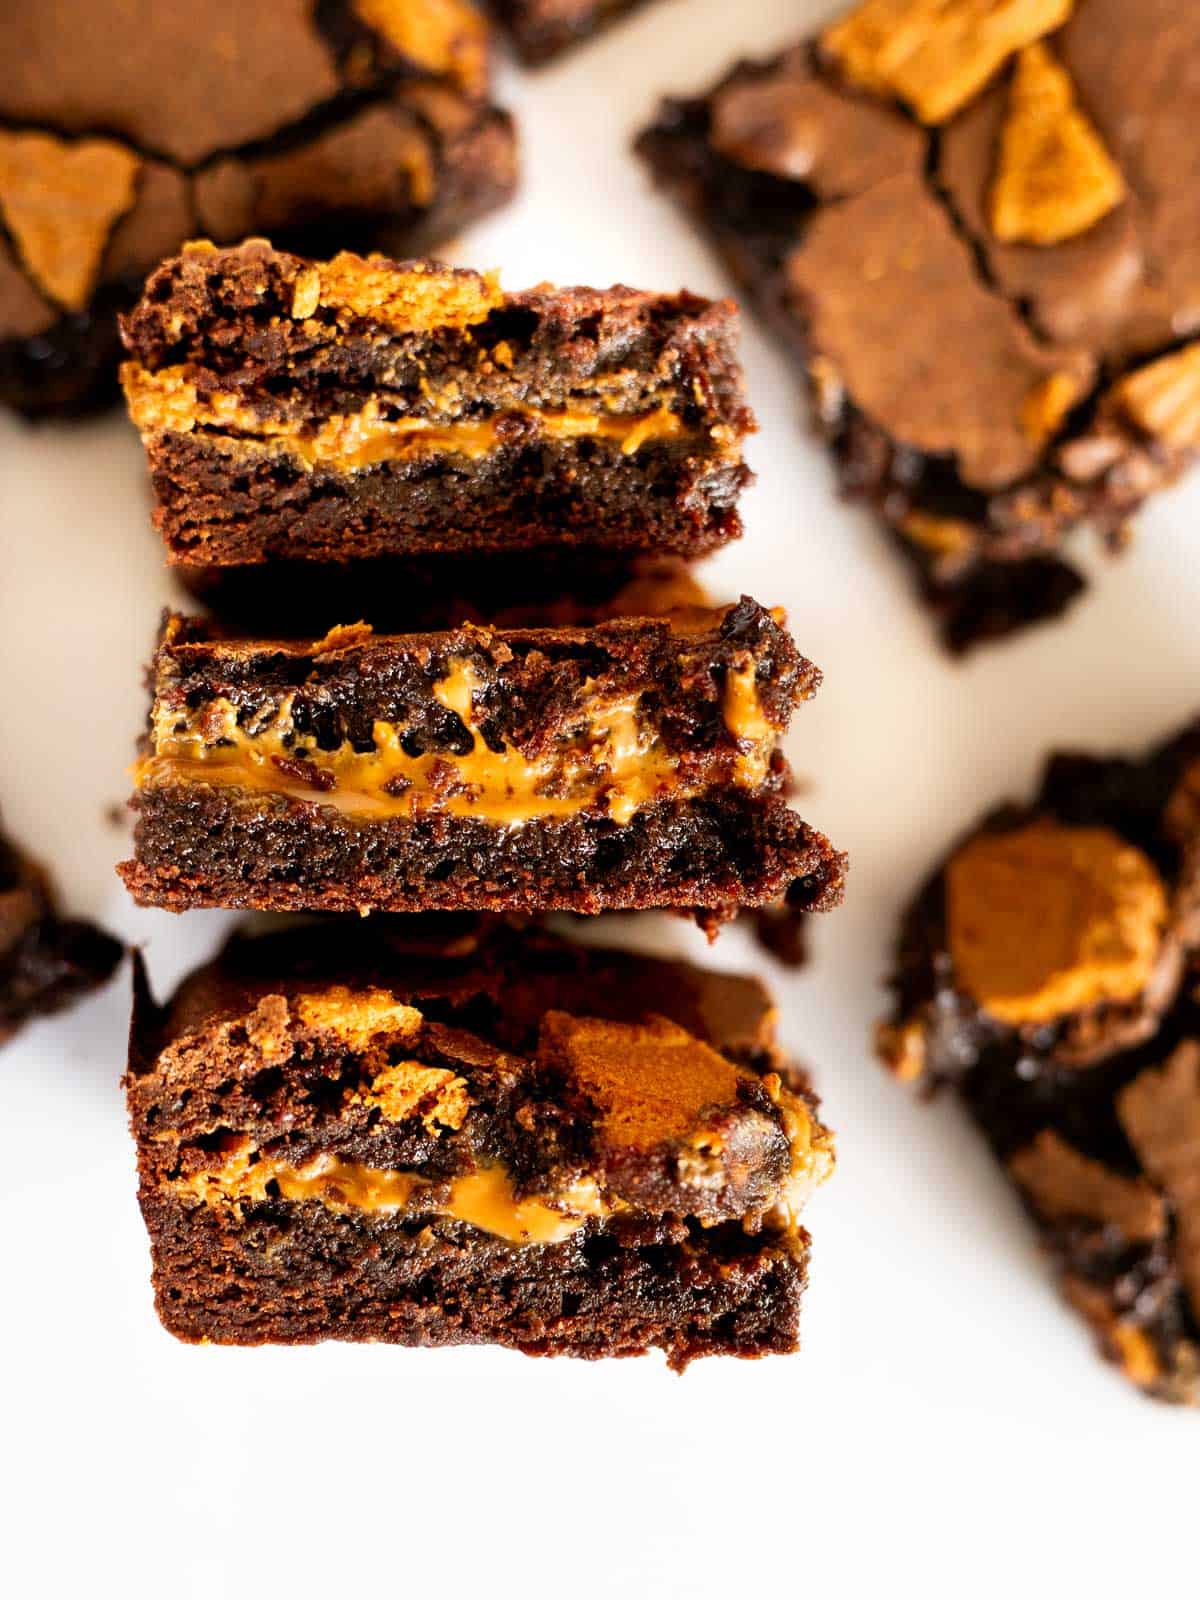
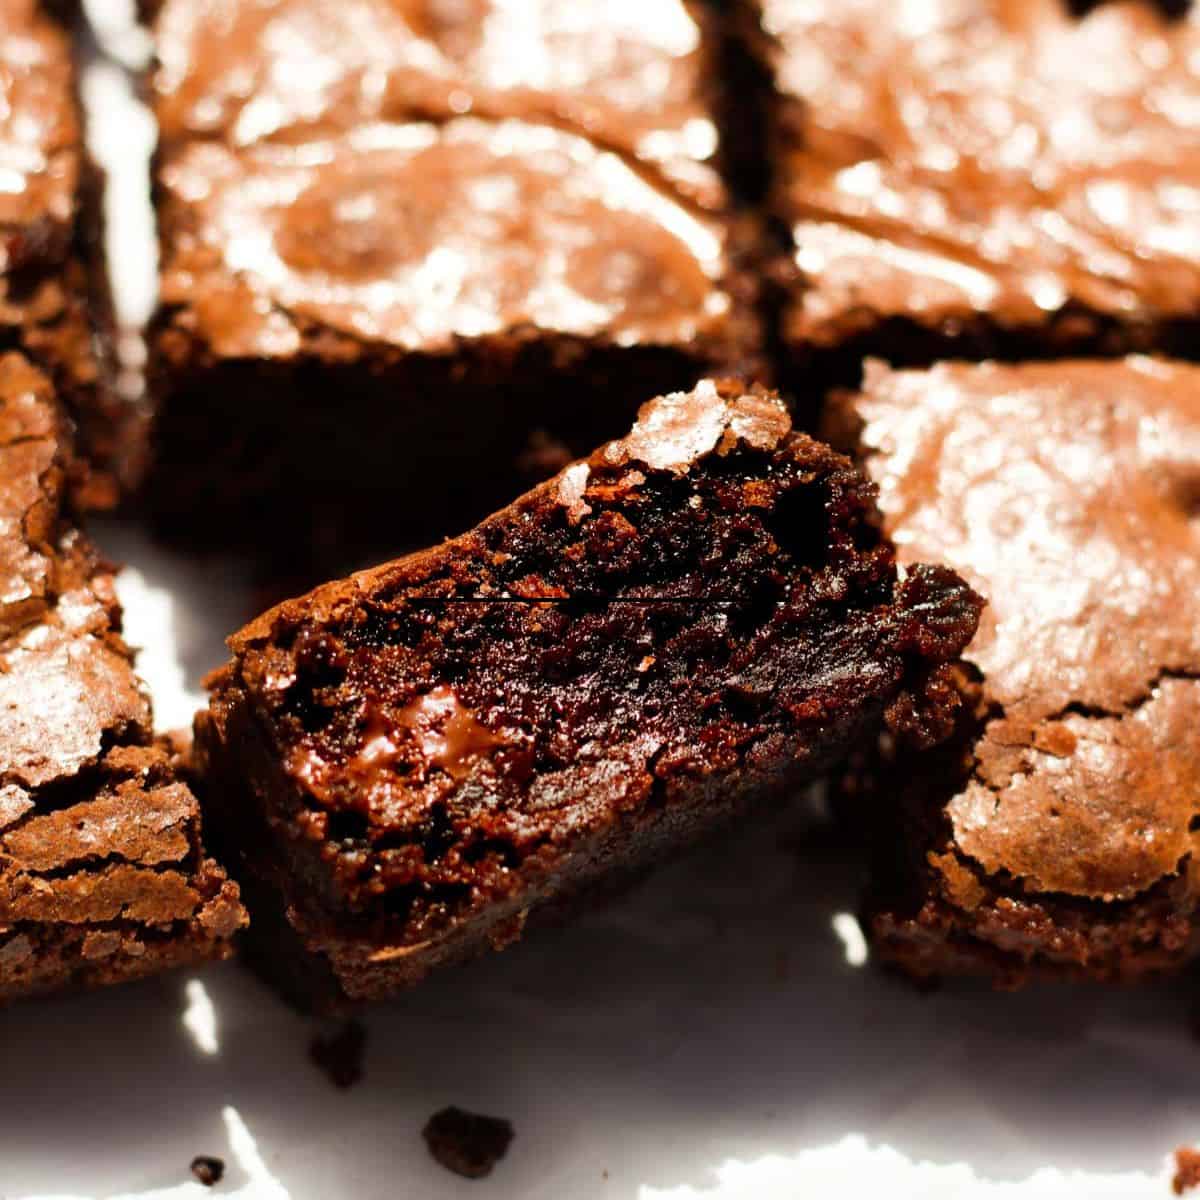
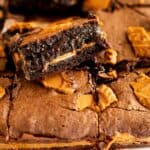
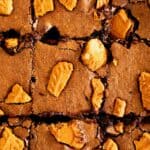
Biscoff Brownies are rich, decadent, and so out of this world delicious. A thick, extra fudgy brownie is sandwiched around a creamy layer of cookie butter and topped with crunchy Biscoff biscuits. You need just 7 ingredients, one bowl, and a few minutes to prepare this one of a kind brownie.
Jump to:
These Biscoff Brownies are certainly going to become a new family favorite. I combined the idea of my favorite fudgy brownies with my Biscoff Blondies, and came up with this fudgy, decadent, truly unique brownie.
It's an easy recipe to make, made with less than 10 ingredients, and is all prepared in one bowl. If you're looking for a new dessert to try, then let it be these incredible Cookie Butter Brownies!
If you're a Biscoff lover, then you've definitely got to try these Cookie Butter Cupcakes!
Why You'll Love These Biscoff Brownies
- They're rich, fudgy, and over the top delicious
- The brownies are thick, gooey, and sandwiched around a creamy layer of Biscoff spread
- They're made in one bowl and take minimal time to prepare
- You only need 7 staple ingredients
- Both kids and adults love them
- You can easily double the recipe and make them for a party
Ingredients Needed
*the full list of ingredients and measurements can be found in the recipe card below*
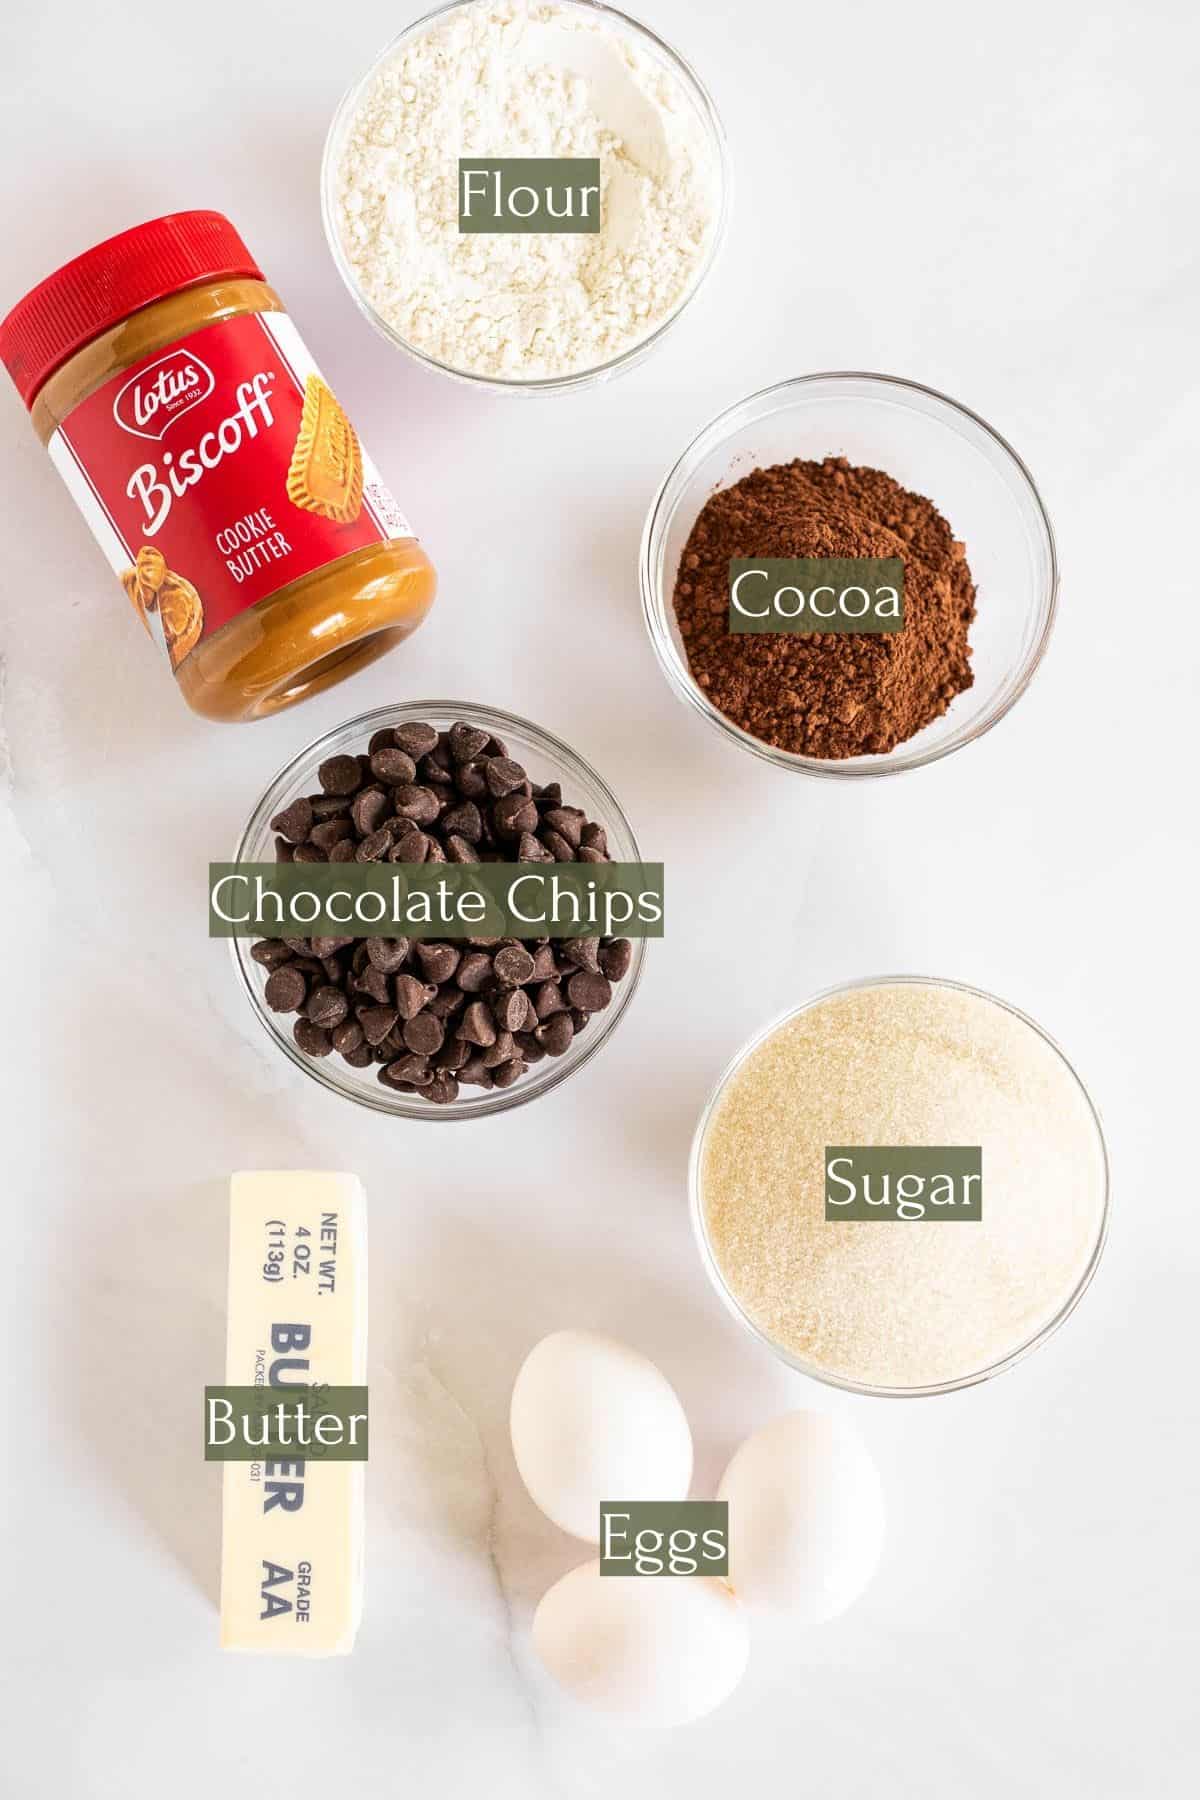
Biscoff: Also known as cookie butter, this spread gets frozen in a square first, then added in between 2 layers of brownie batter for the ultimate sweet treat.
Butter: I always bake with salted butter, but you can use unsalted if necessary it won't change the flavor much.
Sugar: For these brownies, we're making them with all granulated sugar.
Eggs: You will need three large eggs. These add richness, fat, and help bind everything together.
Flour: I only tested these with regular all purpose flour. Since the Biscoff spread contains gluten there is no way to make these gluten free.
Cocoa powder: For this recipe you can use either regular unsweetened cocoa powder or Dutch processed cocoa powder. Both work well, the only thing is the color will vary slightly.
Chocolate chips: I found that the flavor of semi-sweet chocolate chips is what I prefer, but a dark chocolate chip is a good substitute. Just do not use milk or white.
Vanilla and salt: To round out the flavor, a splash of vanilla extract and a pinch of salt is needed.
Step-By-Step Instructions
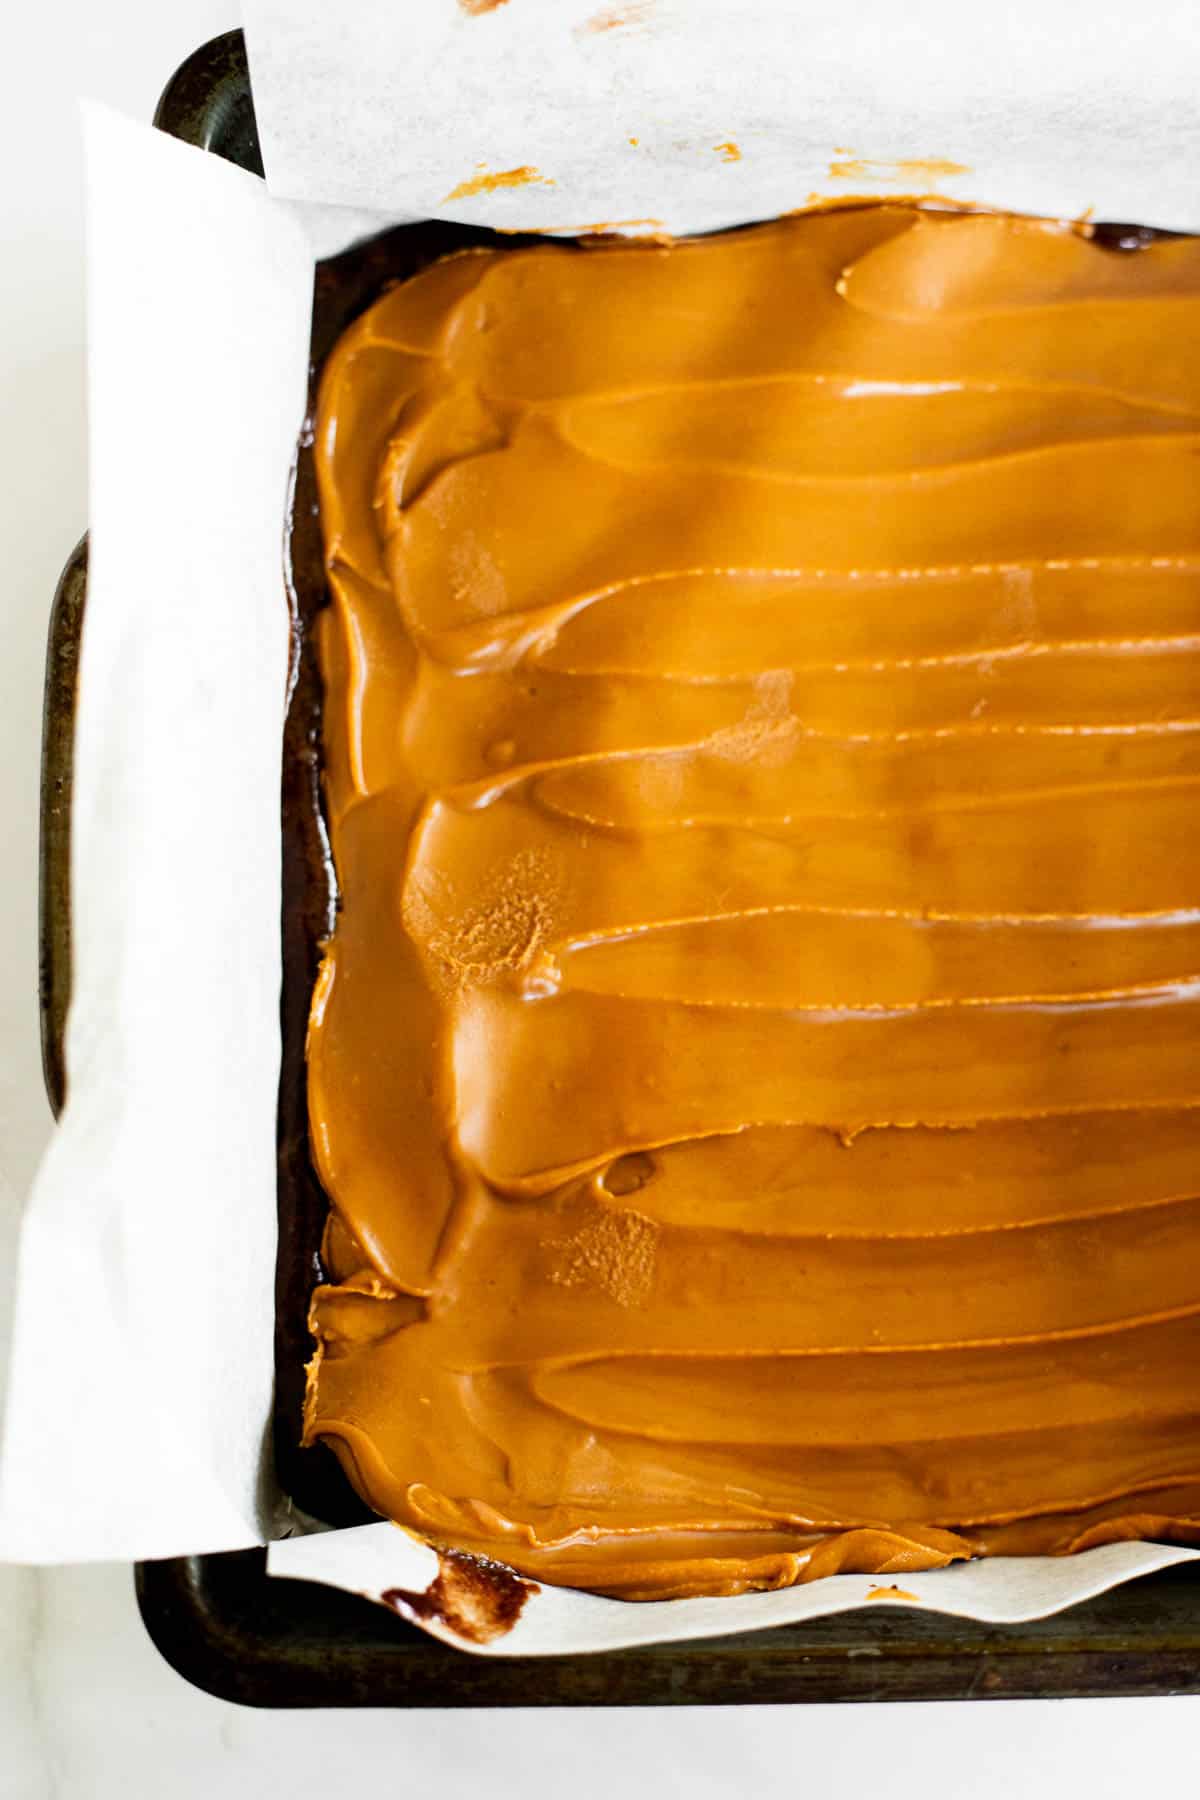
STEP ONE: Take a sheet of parchment paper and use a pencil to trace the bottom of an 8x8 metal baking pan onto the paper. Flip the parchment over and evenly spread the Biscoff cookie butter into a square matching the shape you traced. Place into the freezer for at least 20 minutes before you start to make the brownie batter.

STEP TWO: Preheat your oven to 350°F and line an 8x8 metal baking pan with parchment paper.
STEP THREE: In a large microwave safe bowl, melt butter and chocolate chips together in 30 second intervals, stirring between each interval until everything is smooth and melted. Set aside for 5 minutes. (do not microwave for more than 90 seconds)
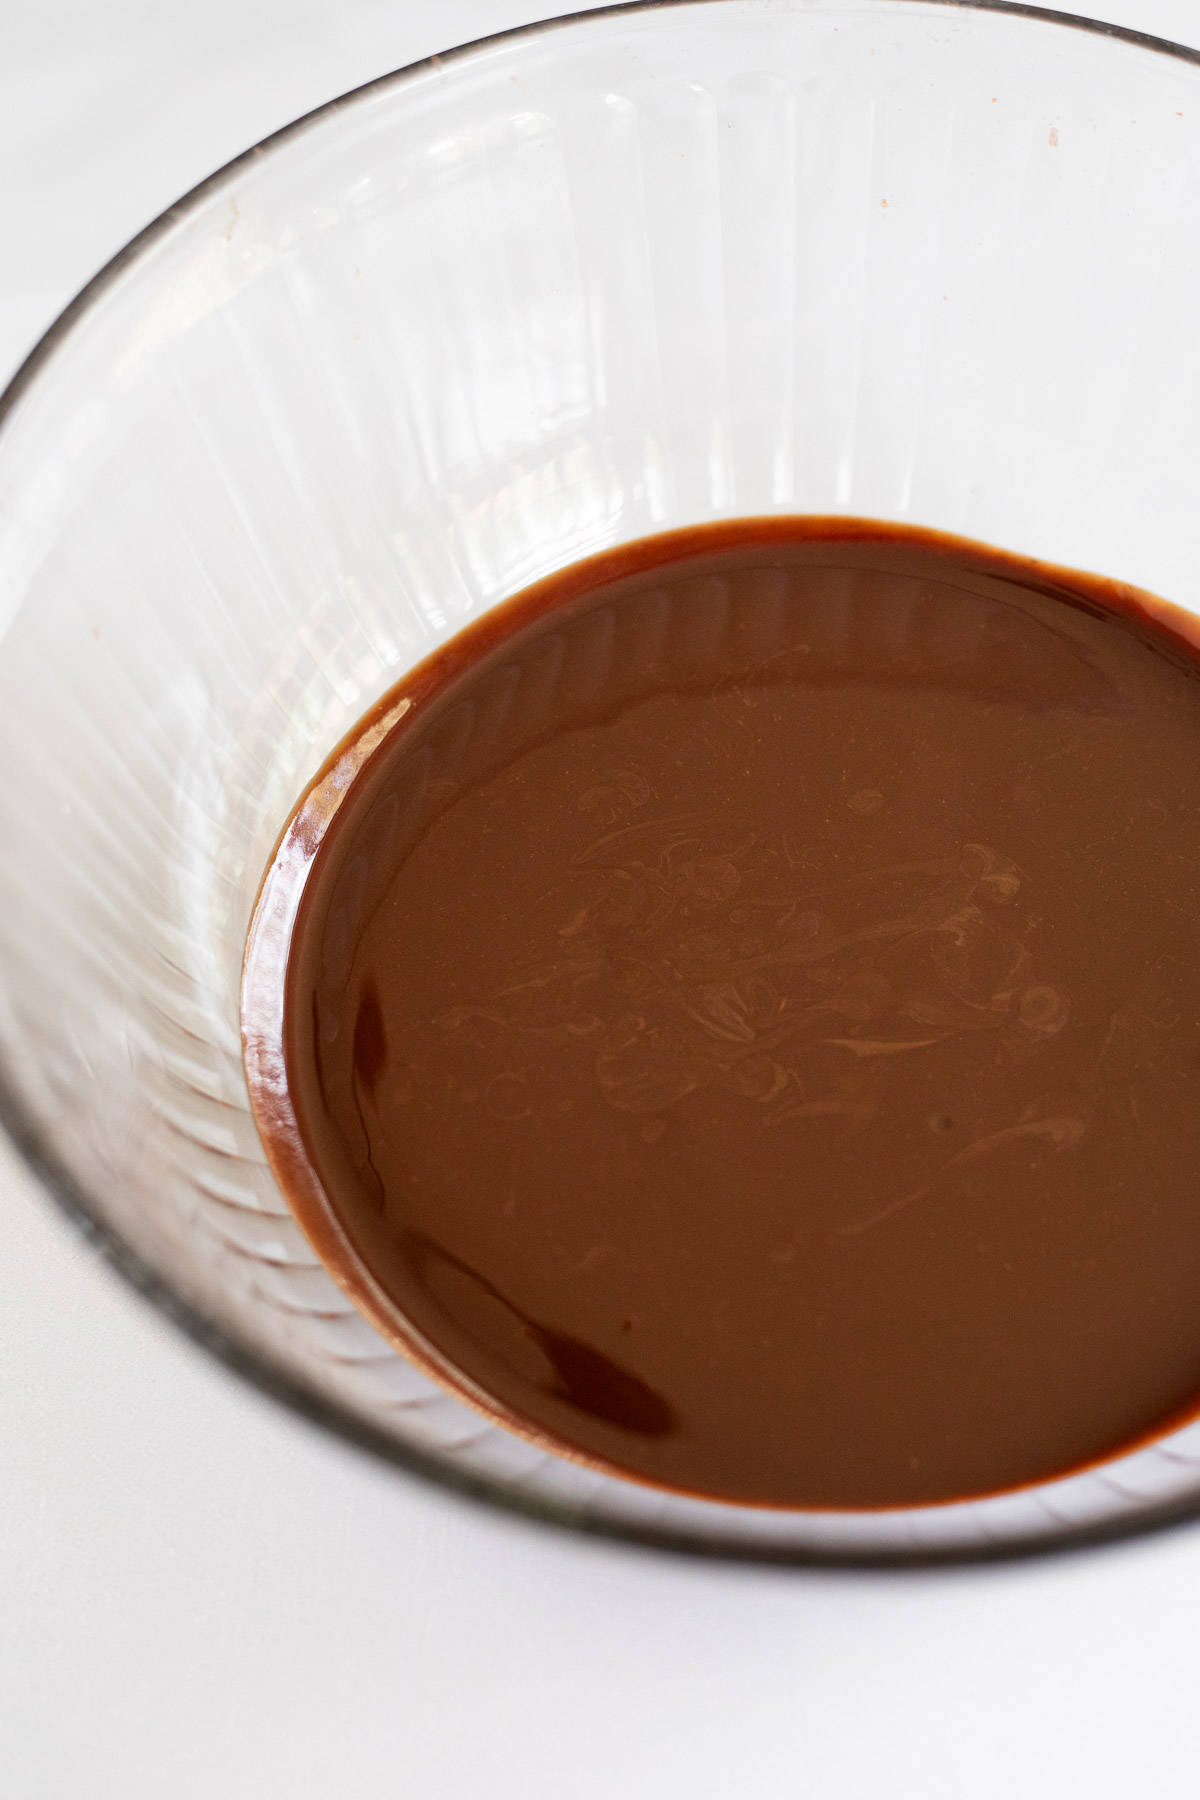
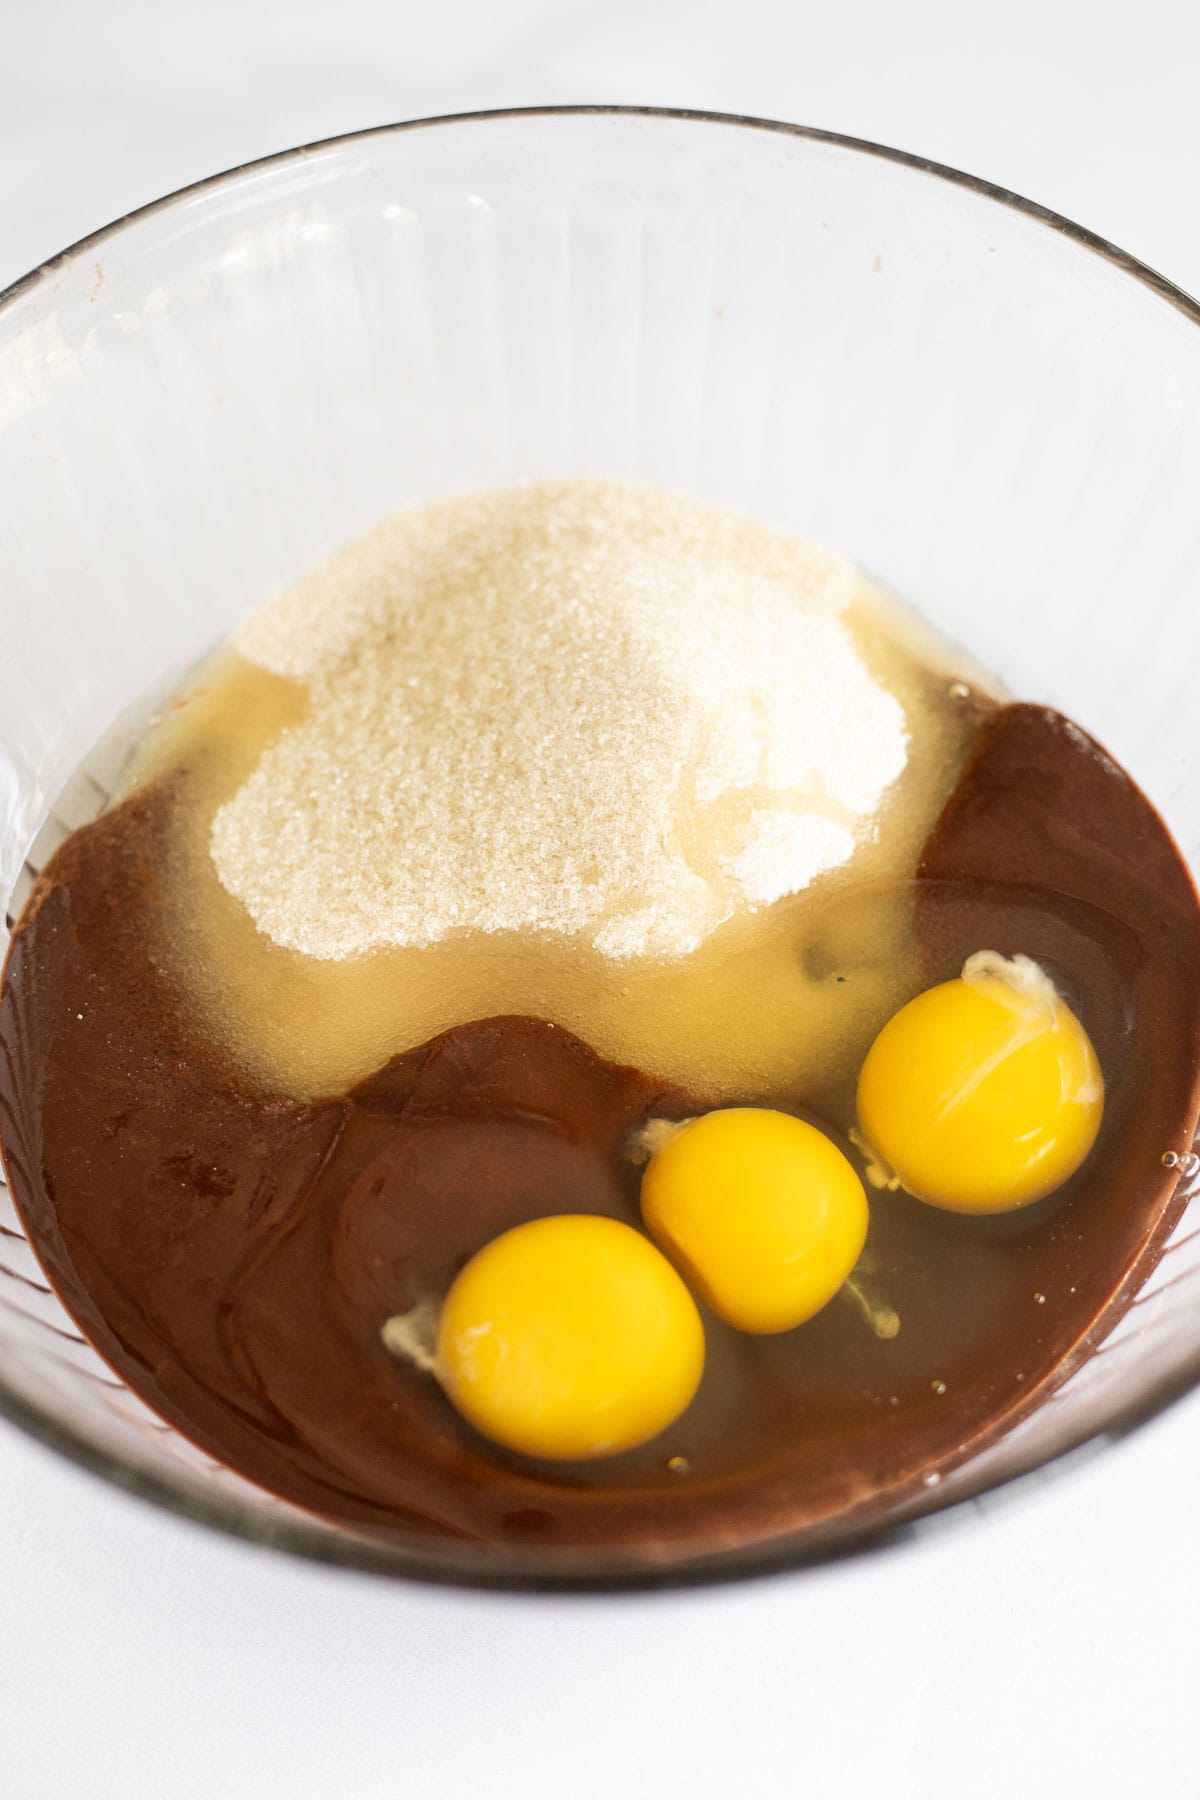
STEP FOUR: After 5 minutes, add sugar, eggs, and vanilla extract into the bowl with the slightly cooled butter/chocolate and stir vigorously for 2-3 minutes. Mixture should look lighter in color.
STEP FIVE: Next, add the flour, cocoa powder, and salt into the mixing bowl and gently fold all ingredients together until just combined and no traces of flour remain.
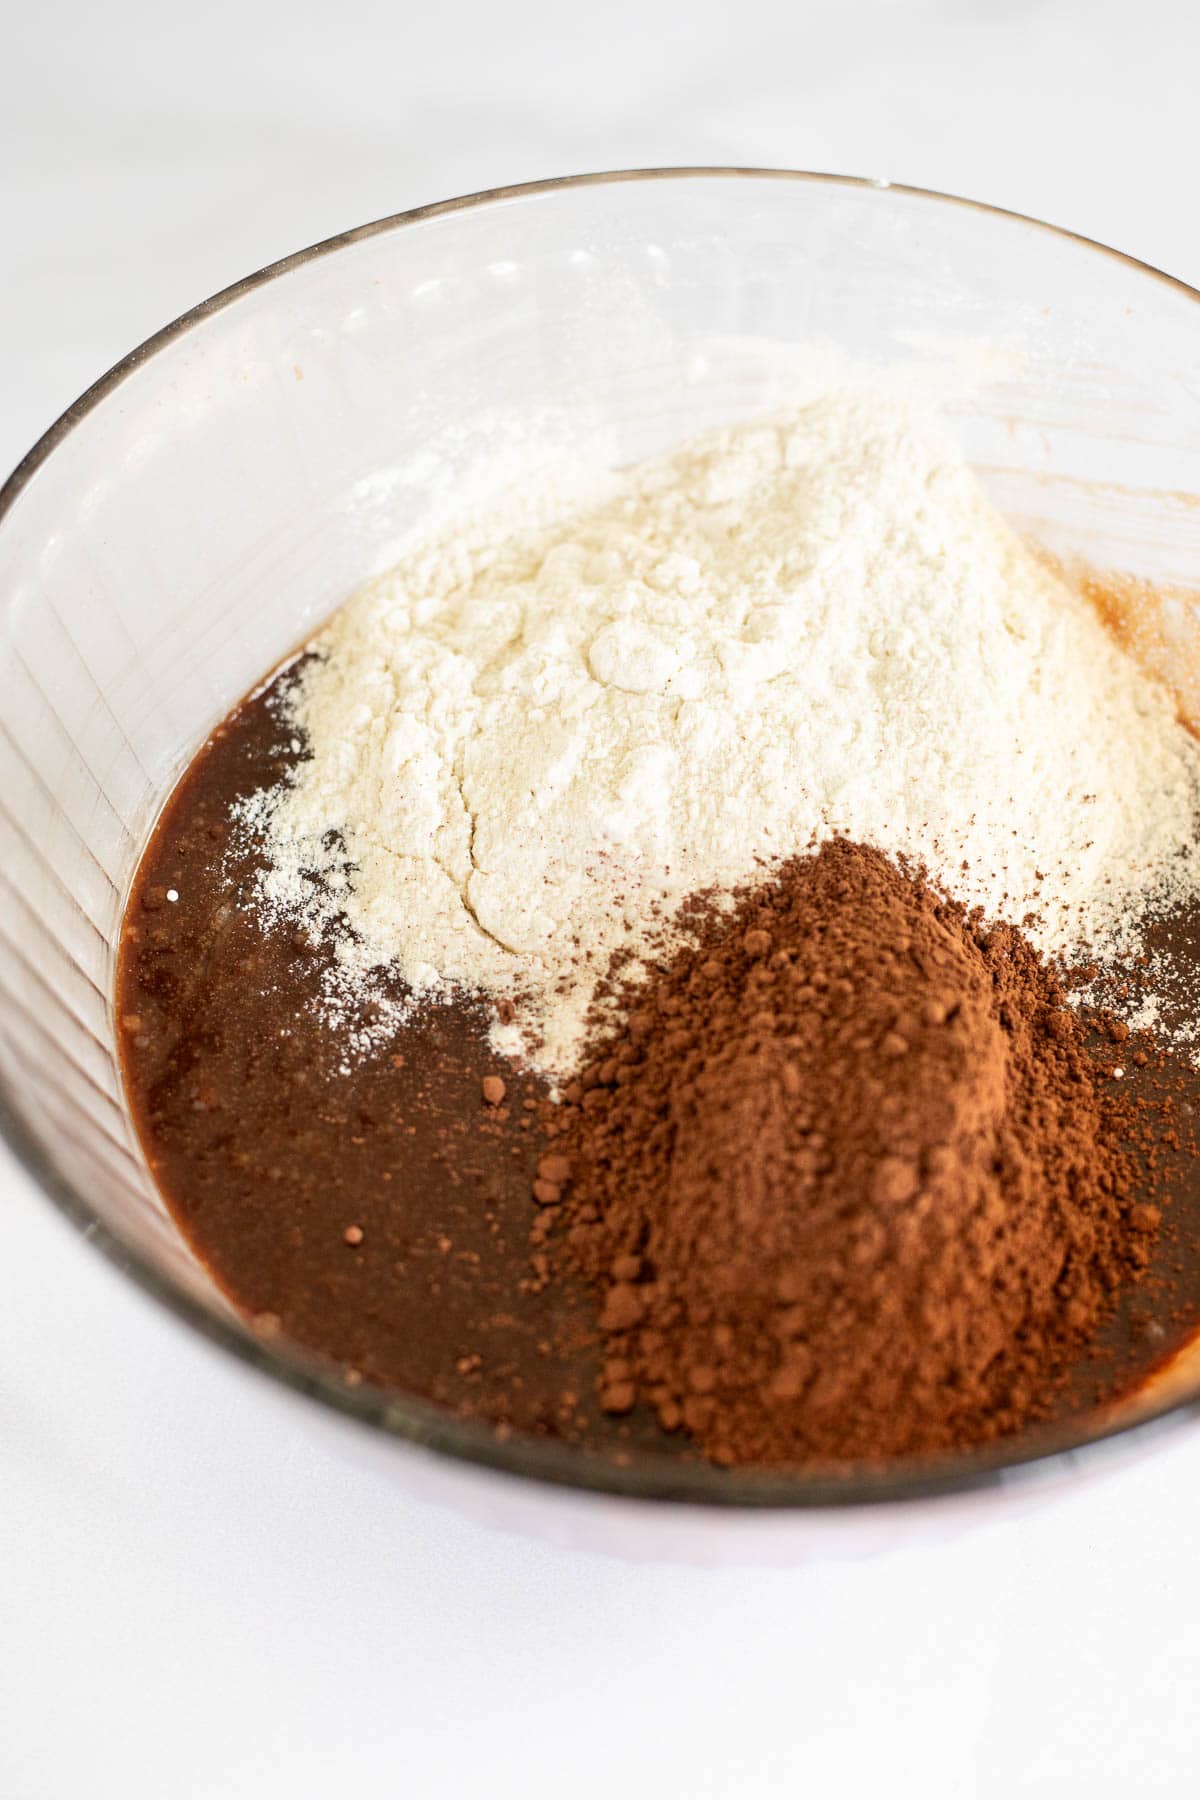
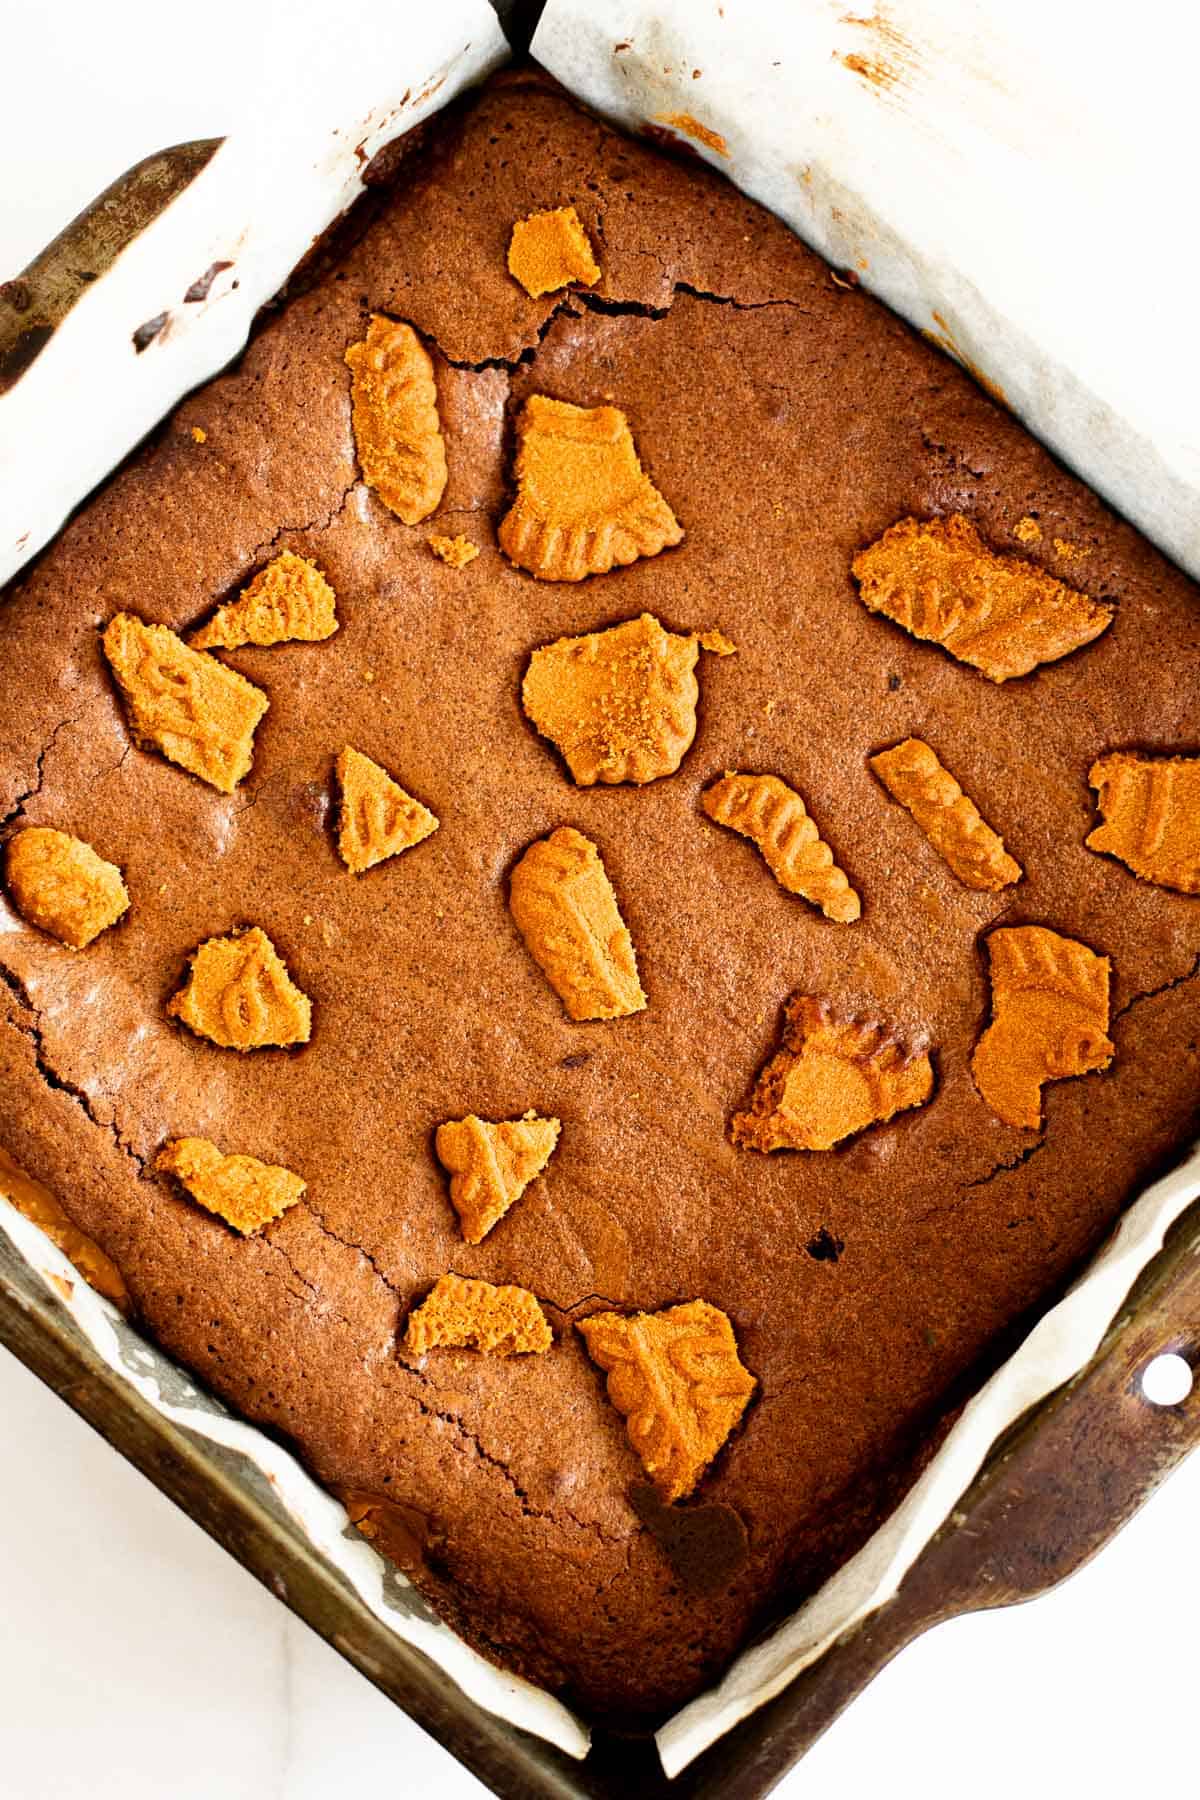
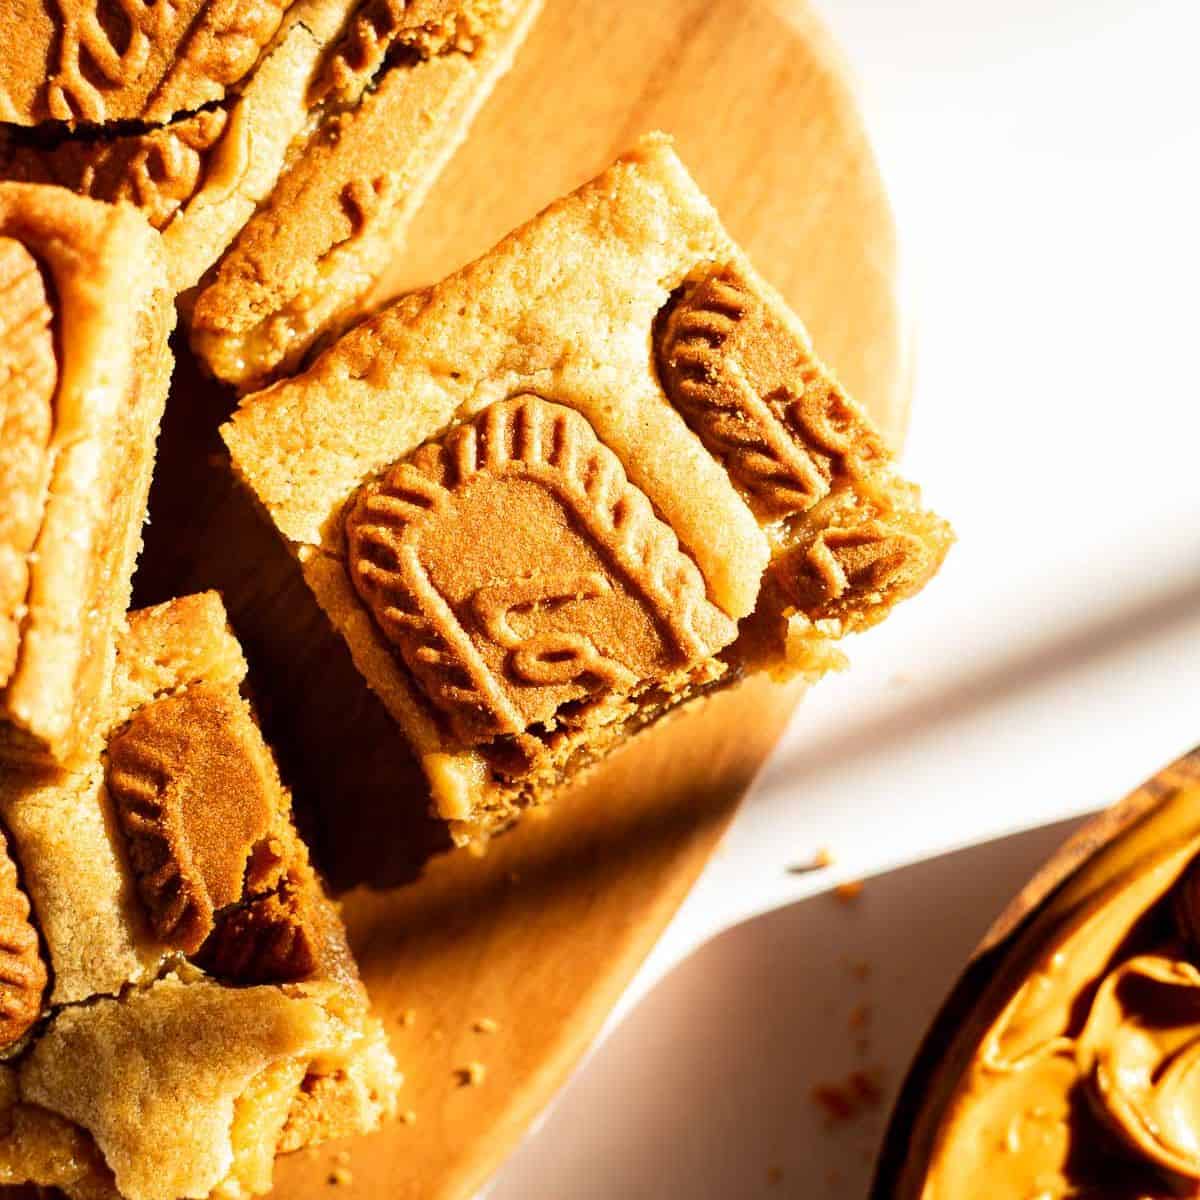
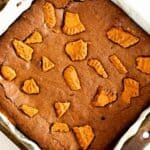
STEP SIX: Pour half of the brownie batter into the bottom of your prepared pan and spread it into an even layer, take the frozen Biscoff layer out of the freezer, gently peel it away from the parchment, and lay on top of the brownie batter. Pour remaining batter over top of the Biscoff and add a sprinkle of chopped Biscoff biscuits.
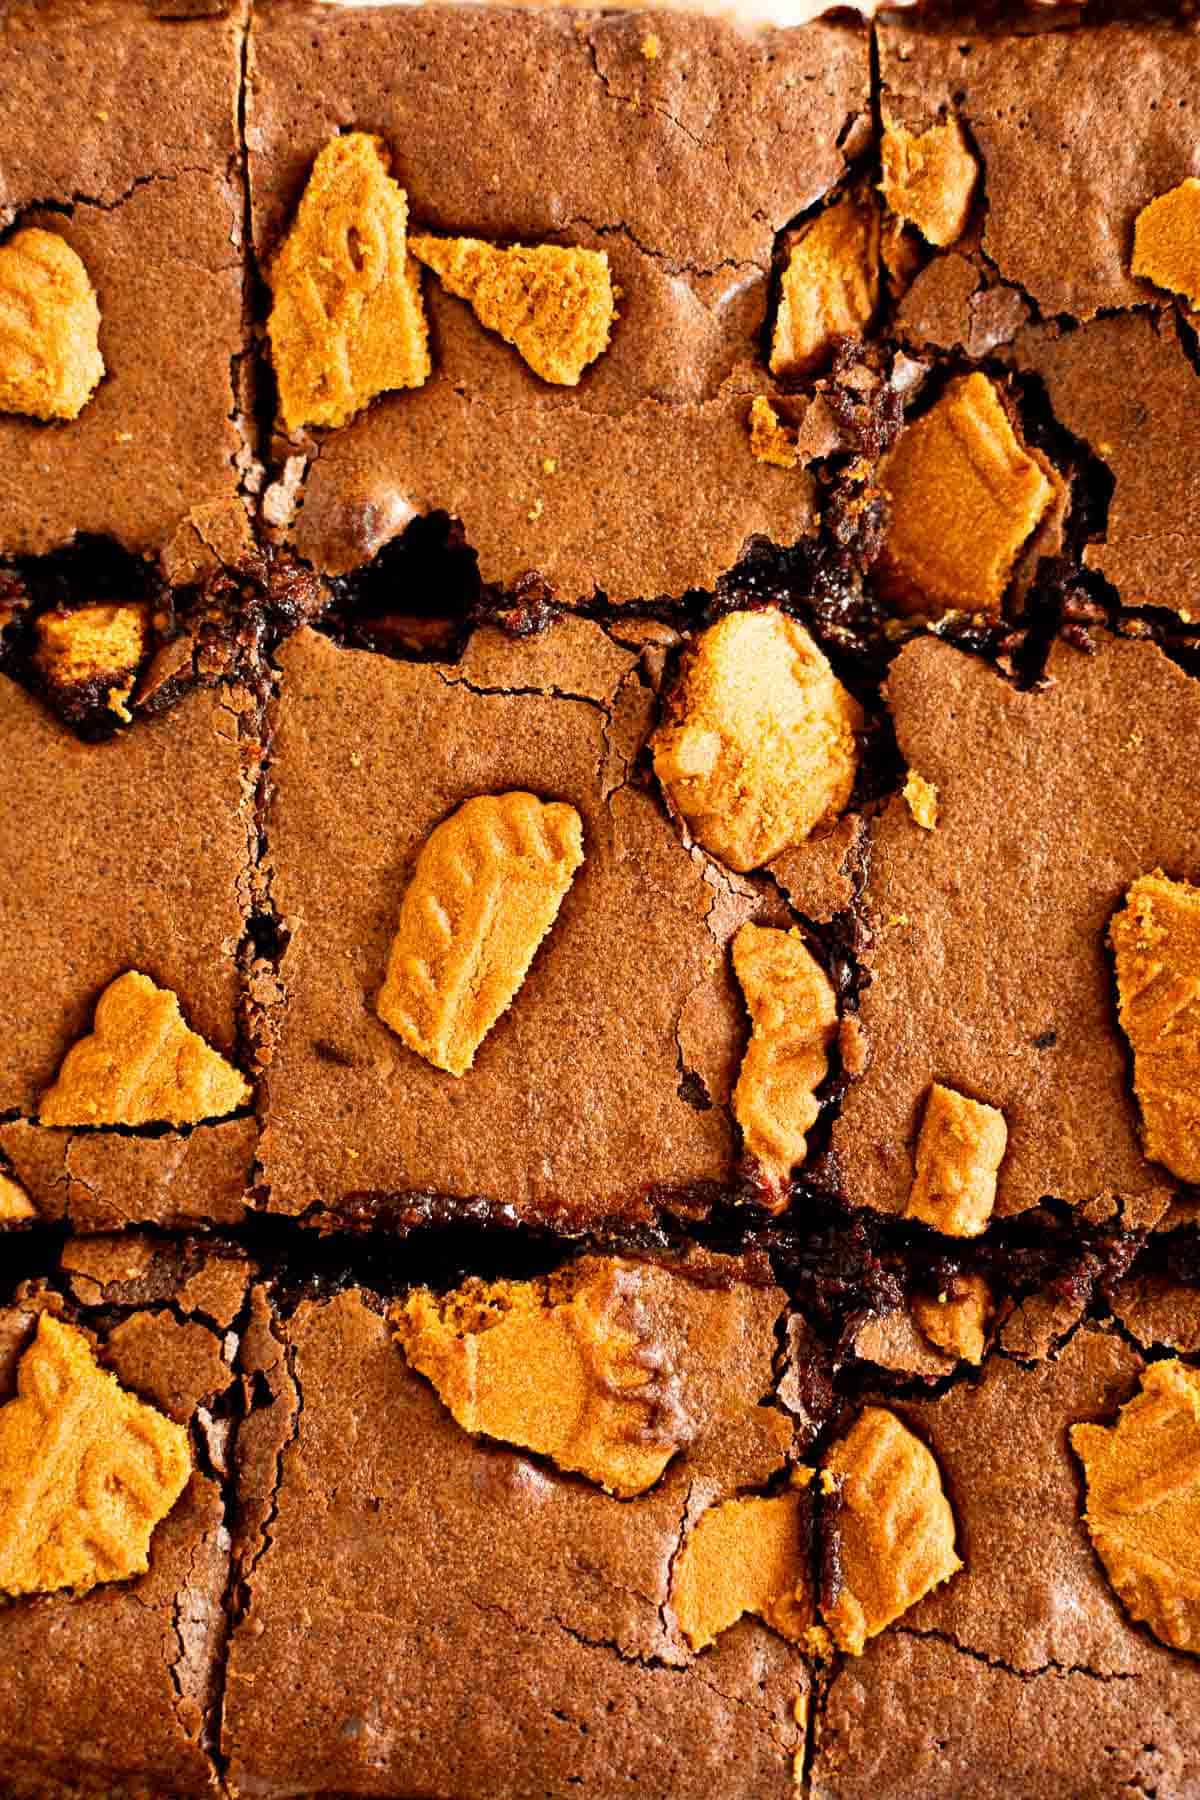
STEP SEVEN: Bake for 28-30 minutes, or until a toothpick inserted into the center comes out mostly clean but with a few moist crumbs. Carefully remove the cookie butter brownies from the oven and allow to cool completely before slicing into squares.
Recipe Variations
- Dairy free: Substitute the butter with vegan butter for a dairy free twist
- Add chocolate chips: If you want, you can add ½ cup of chocolate chips to the brownie batter for extra richness.
- Cookies on the bottom: Place a layer of Biscoff Biscuits on the bottom of your prepared pan first, then layer as directed.
- Double the recipe: You can easily double the recipe by preparing everything the exact same way, just with double the ingredients. Bake in a 9x13 inch metal pan for about 30 minutes. The Biscoff brownies will be slightly thicker, but still just as yummy!
Expert Baking Tips
- Use room temperature ingredients: Baking with room temperature ingredients is one way to significantly improve the quality of your baked goods without really trying. Room temp ingredients mix together much smoother and form a nice batter.
- Freeze cookie butter beforehand: It's important that you freeze your layer of Biscoff before adding it to the middle. It should easily peel off the parchment, that's how you know it's good.
- Don't burn the chocolate: When microwaving the chocolate chips and butter, try not to heat for more than 90 seconds otherwise you run the risk of burning your chocolate and the brownies won't turn out well.
- Careful not to overmix: After you add in the flour, gently fold everything together until just incorporated, you don't want to overmix or else the brownies will be tough.
- Bake in a metal pan: Metal is ideal for baking because it conducts heat evenly. Glass and ceramic do not conduct it as well and will cause your baking time to increase.
- Don't overbake: For gooey, fudgy brownies, take care not to overbake them!
- Cookies on top: I sprinkled chopped cookies over top of my brownies, but you could do whole ones, halves, or even fine crumbs.
- Cool before cutting: For nice clean cuts, be sure to cool completely (and even chill a bit) before using a sharp knife to make squares.
Frequently Asked Questions
If you want to check, you can poke a toothpick into the center and if it comes out mostly clean with a few moist crumbs, you can pull them out and cool before cutting.
Sure! You can use up to 1 ½ cups of cookie butter for the middle layer if you really want it thick.
Just keep in mind, since you need to freeze it first, it will take longer to freeze before you can layer it in between brownie batter.
You should be able to find it in your local grocery store where the peanut butter is stocked. If not, you can always order it on Amazon.
The trick is to not overbake them! I suggest taking the brownies out of the oven when they're slightly undercooked and allowing the residual heat to finish the baking process.
Storing and Freezing Instructions
STORING: Store leftover brownies in an airtight container at room temperature for 3-4 days or up to 1 week if stored in the fridge.
FREEZING: If you'd like to enjoy a cookie butter brownie any time, try freezing the leftovers! Wrap each one individually in plastic wrap then aluminum foil and freeze for up to 3 months. Thaw to room temp (or eat slightly frozen like I like them!) and enjoy!
A quick note about baking in grams...
You may notice that most of my newer recipes are listed in grams instead of cups. That's because it's really the most accurate way to measure and bake exceptional treats every time with little room for error.
I do try and include cup measurements, but I highly suggest investing in a $10 kitchen scale. It's really worth it!
Related Recipes You'll Love!
Did you make these BISCOFF BROWNIES? If so, I would appreciate you leaving a comment and star rating down below.
Also, stay connected with me on Instagram, Pinterest, and even Facebook! Happy Baking!
PrintBiscoff Brownies
Biscoff Brownies are rich, decadent, and so out of this world delicious. A thick, extra fudgy brownie is sandwiched around a creamy layer of cookie butter and topped with crunchy Biscoff biscuits. You need just 7 ingredients, one bowl, and a few minutes to prepare this one of a kind brownie.
- Prep Time: 30 minutes
- Cook Time: 28 Minutes
- Total Time: 58 minutes
- Yield: 12 Servings 1x
- Category: Brownies
- Method: Baking
- Cuisine: American
- Diet: Vegetarian
Ingredients
- 150g Biscoff spread (¾ cup)
- 113g Salted butter (1 stick)
- 140g semi-sweet or dark chocolate chips (¾ cup)
- 250g granulated sugar (1 ¼ cup)
- 3 large eggs- room temperature
- ½ teaspoon vanilla extract
- 120g all purpose flour (1 cup)
- 24g unsweetened cocoa powder (¼ cup)
- ¼ teaspoon Kosher salt
- 2-3 chopped Biscoff biscuits (optional)
Instructions
- Take a sheet of parchment paper and use a pencil to trace the bottom of an 8x8 metal baking pan onto the paper. Flip the parchment over and use an offset spatula to evenly spread the Biscoff cookie butter into a square matching the size of the shape you traced. Place flat into the freezer for at least 20 minutes before you start to make the brownie batter.
- After 20 mintues, preheat your oven to 350°F and line an 8x8 metal baking pan with parchment paper.
- In a large microwave safe bowl, melt butter and chocolate chips together in 30 second intervals, stirring between each interval until everything is smooth and melted. Set aside for 5 minutes. (do not microwave for more than 90 seconds)
- After 5 minutes, add the sugar, eggs, and vanilla extract into the bowl with the slightly cooled butter/chocolate and stir vigorously for 2-3 minutes. Mixture should look lighter in color.
- Next, add in the flour, cocoa powder, and salt to the mixing bowl and gently fold all ingredients together with a rubber spatula until just combined and no traces of flour remain.
- Pour half of the brownie batter into the bottom of your prepared pan and spread it into an even layer, take the frozen Biscoff layer out of the freezer, gently peel it away from the parchment, and lay on top of the brownie batter. Pour remaining batter over top of the Biscoff and add a sprinkle of chopped Biscoff biscuits.
- Bake for 28-30 minutes, or until a toothpick inserted into the center comes out mostly clean but with a few moist crumbs. Carefully remove the cookie butter brownies from the oven and allow them to cool completely before using a sharp knife to slice them into squares.
Notes
-
- Use room temperature ingredients: Baking with room temperature ingredients is one way to significantly improve the quality of your baked goods without really trying. Room temp ingredients mix together much smoother and form a nice batter.
-
- Freeze cookie butter beforehand: It's important that you freeze your layer of Biscoff before adding it to the middle. It should easily peel off the parchment, that's how you know it's good.
-
- Don't burn the chocolate: When microwaving the chocolate chips and butter, try not to heat for more than 90 seconds otherwise you run the risk of burning your chocolate and the brownies won't turn out well.
-
- Careful not to overmix: After you add in the flour, gently fold everything together until just incorporated, you don't want to overmix or else the brownies will be tough.
-
- Bake in a metal pan: Metal is ideal for baking because it conducts heat evenly. Glass and ceramic do not conduct it as well and will cause your baking time to increase.
-
- Don't overbake: For gooey, fudgy brownies, take care not to overbake them!
-
- Cookies on top: I sprinkled chopped cookies over top of my brownies, but you could do whole ones, halves, or even fine crumbs.
-
- Cool before cutting: For nice clean cuts, be sure to cool completely (and even chill a bit) before using a sharp knife to make squares.
- Storing: Keep leftover brownies in an airtight container at room temp for up to 4 days or in the fridge for up to 1 week.


Leave a Reply